The AWS Provider allows Daytona to create and manage workspace projects on Amazon EC2 instances. The provider integrates Daytona with AWS, enabling you to manage workspaces in a scalable and flexible cloud environment.
To use the AWS Provider, you need an AWS programmatic access user with AmazonEC2FullAccess permissions. This policy grants the necessary permissions to manage EC2 instances, which is crucial for Daytona’s workspace project creation and management.
In this guide, we will walk you through the setup and configuration of the Daytona AWS Provider, as well as creating an IAM user with the necessary permissions.
Prerequisites
To follow along with this guide, you should have:
A basic understanding of AWS, AWS IAM and EC2 Instances.
Access to an AWS account with programmatic access and appropriate permissions.
installed Daytona latest version [install from here]
Note
In this guide, Daytona v0.29.1 is used
TL;DR
Create an AWS IAM user with AmazonEC2FullAccess permissions.
Install and configure the Daytona AWS Provider for managing EC2 workspaces.
Set up AWS targets, including configuring access keys, instance type, region, and more.
Troubleshooting tips for common issues like invalid AWS credentials, IAM permission errors, and EC2 instance launch failures.
Step 1: Preparations
Before configuring the Daytona AWS Provider, create an IAM user in AWS with programmatic access and assign the AmazonEC2FullAccess permission. This user will allow Daytona to manage EC2 instances. Follow the below steps to create
Step 1.1: Go to the IAM Management Console.
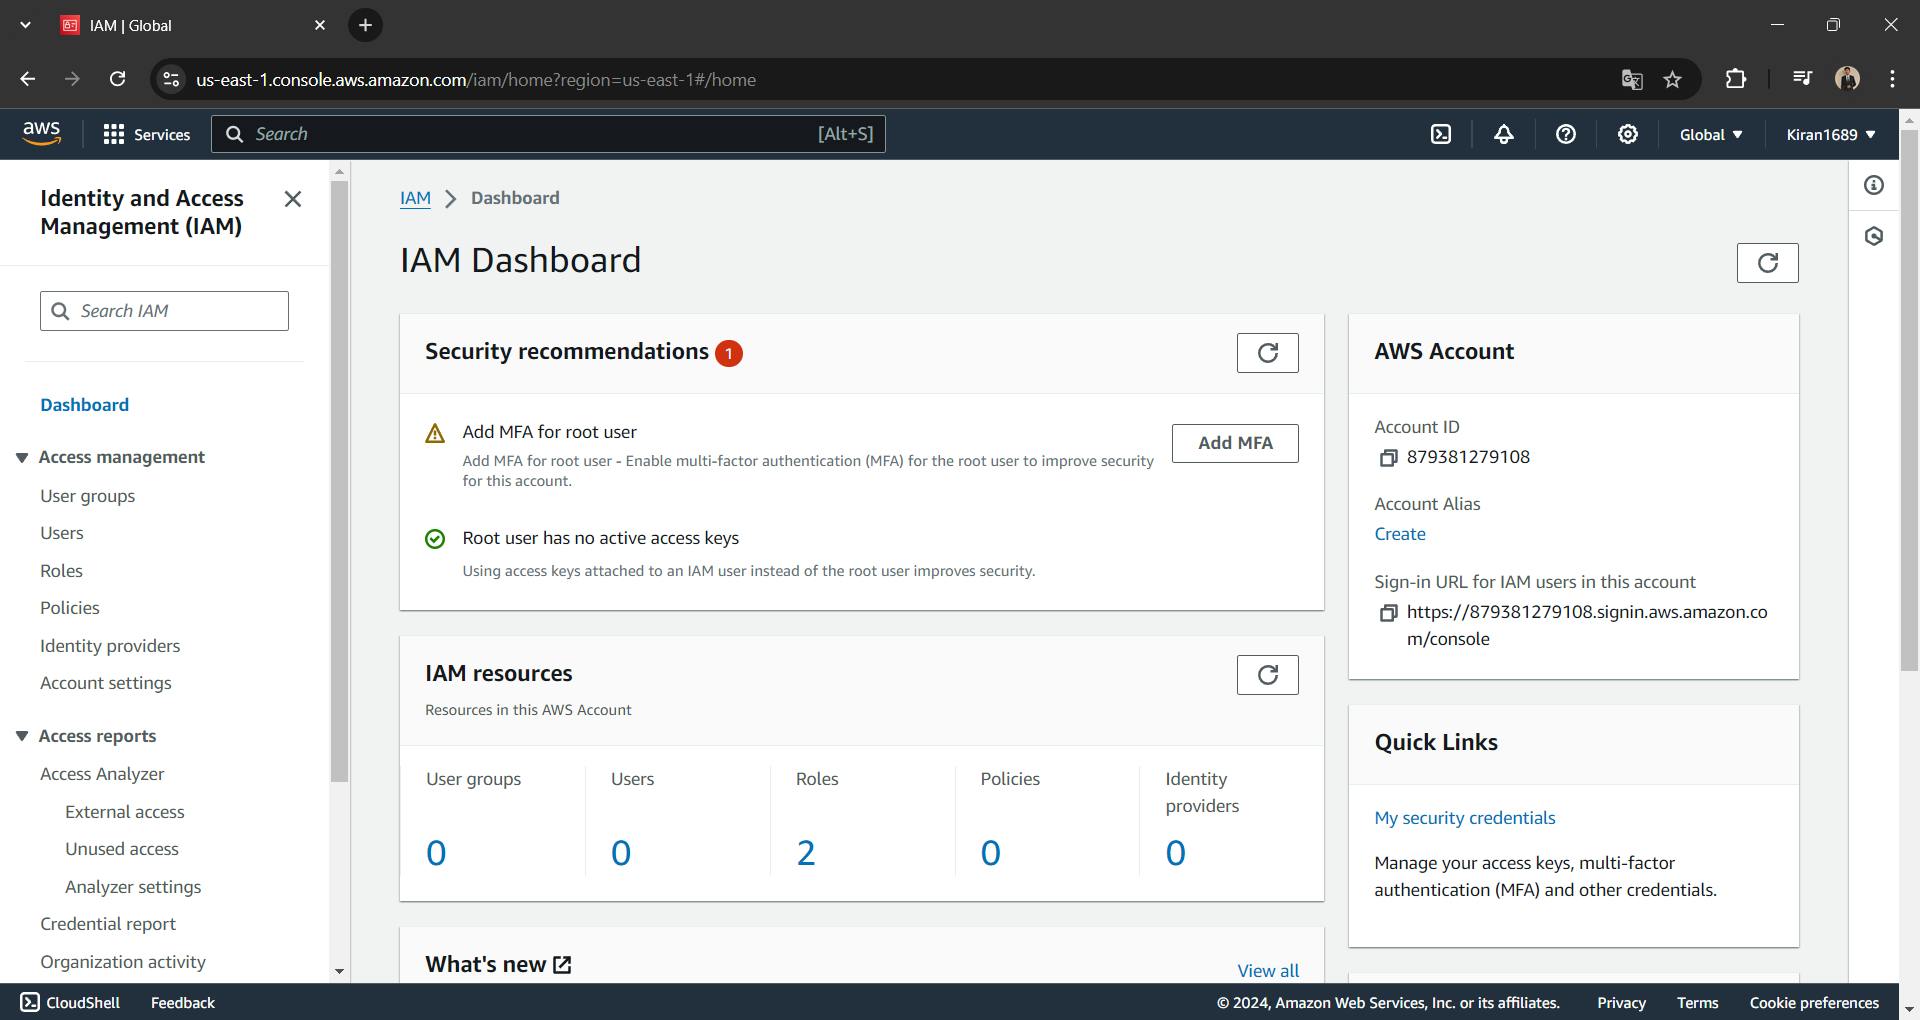
Step 1.2: Click on Users on the left-hand menu and then Create user.
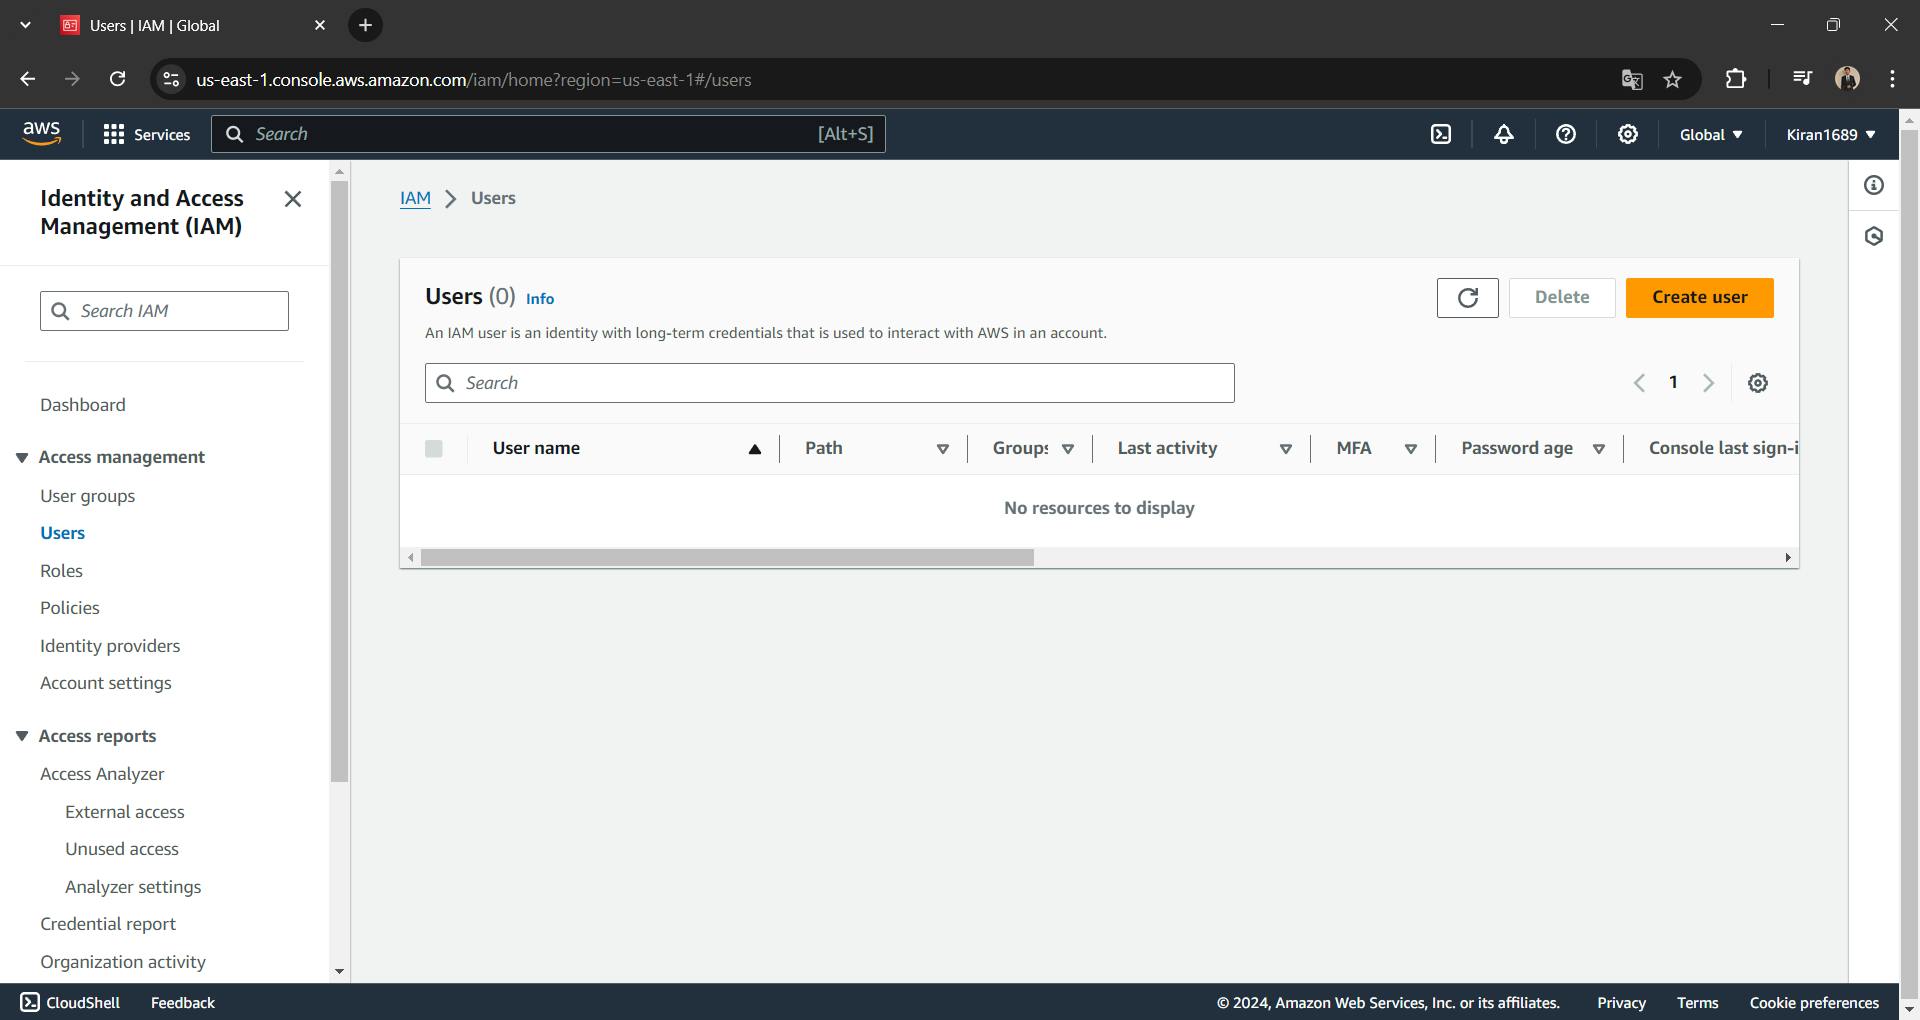
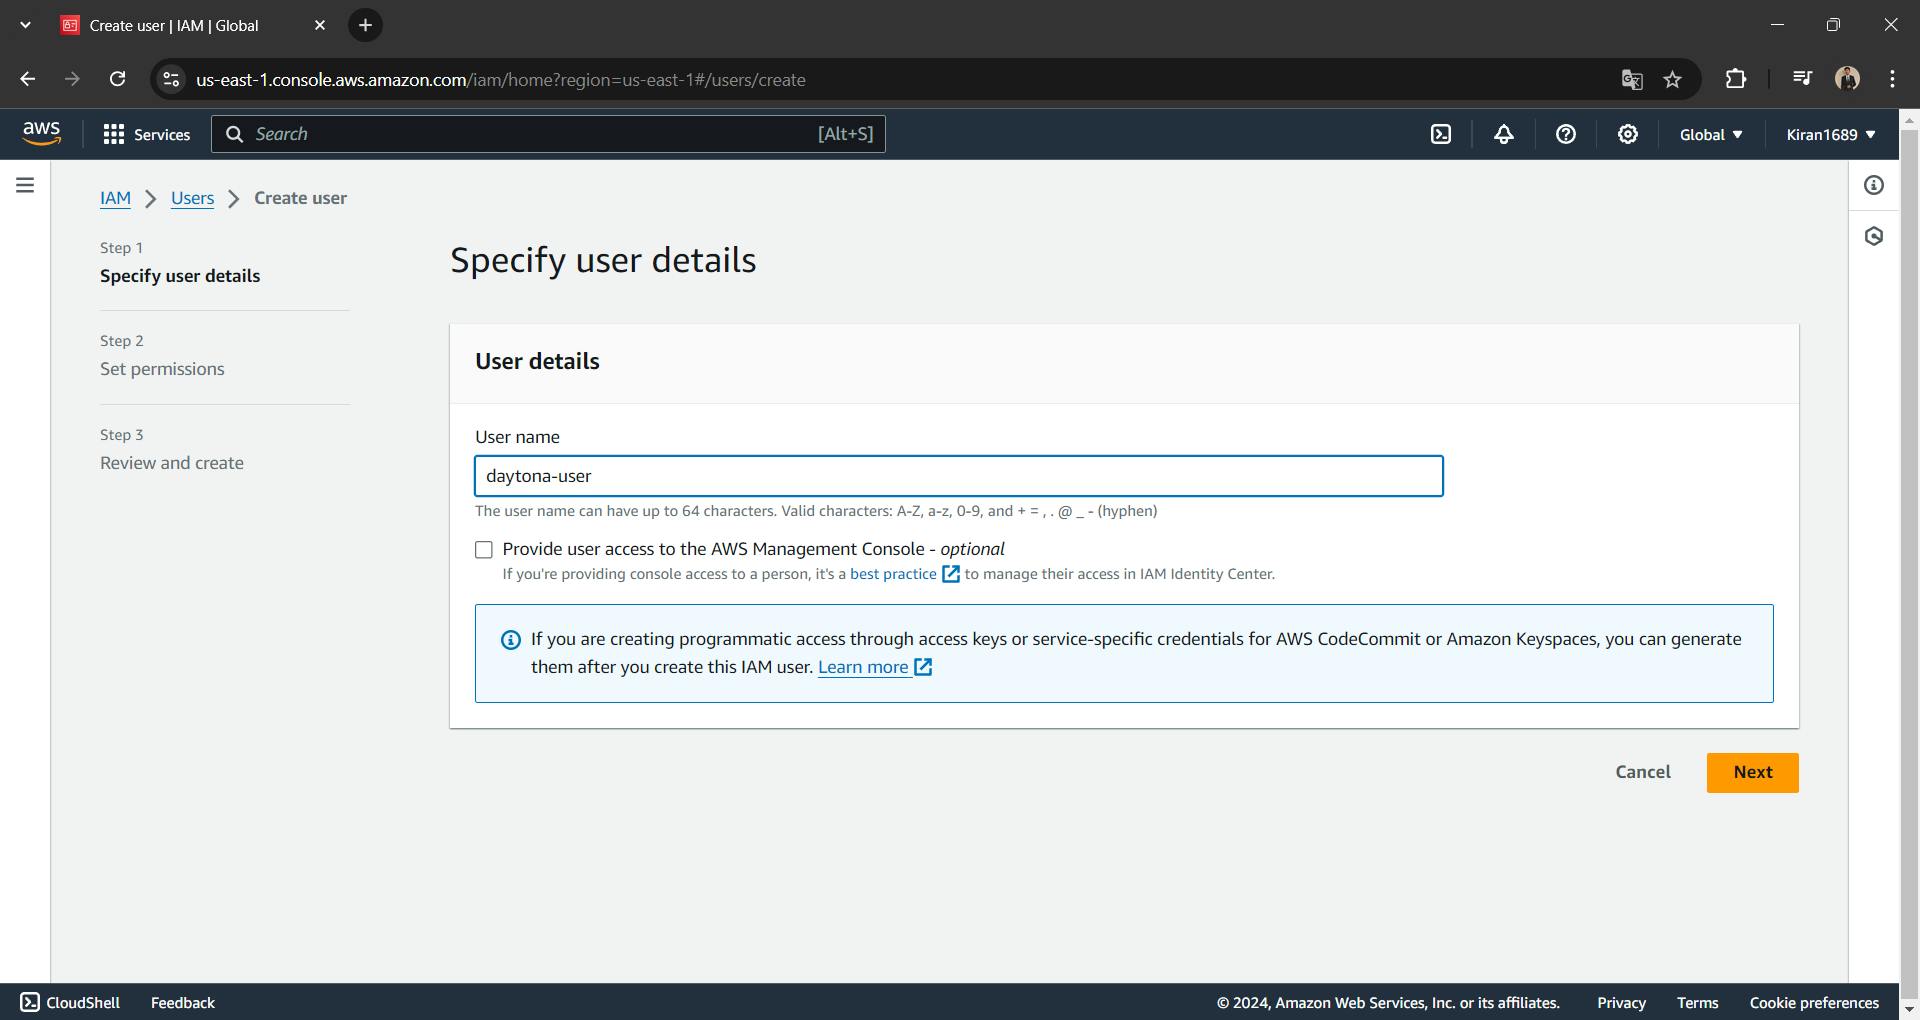
Step 1.3: Enter a username of your choice and click Next.
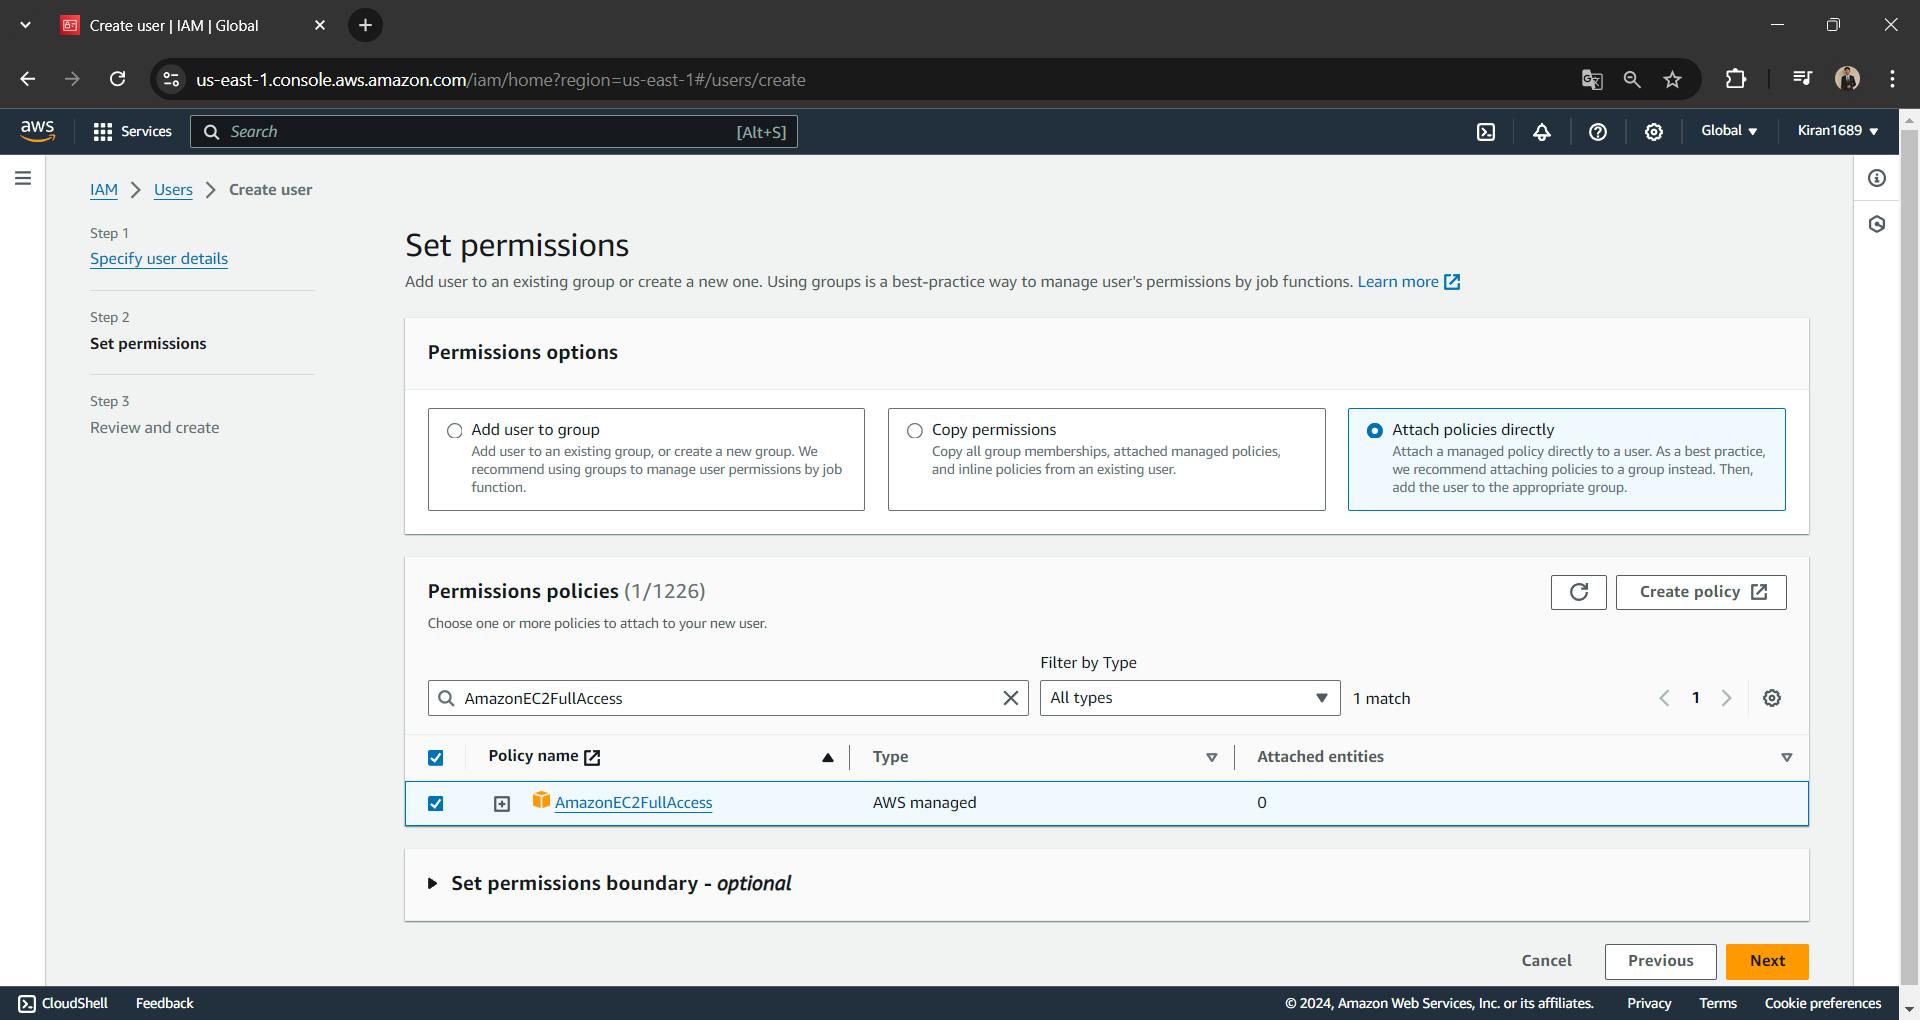
Step 1.4: Under Permission options, choose "Attach policies directly". Under Permission policies, search and select AmazonEC2FullAccess, then click Next.
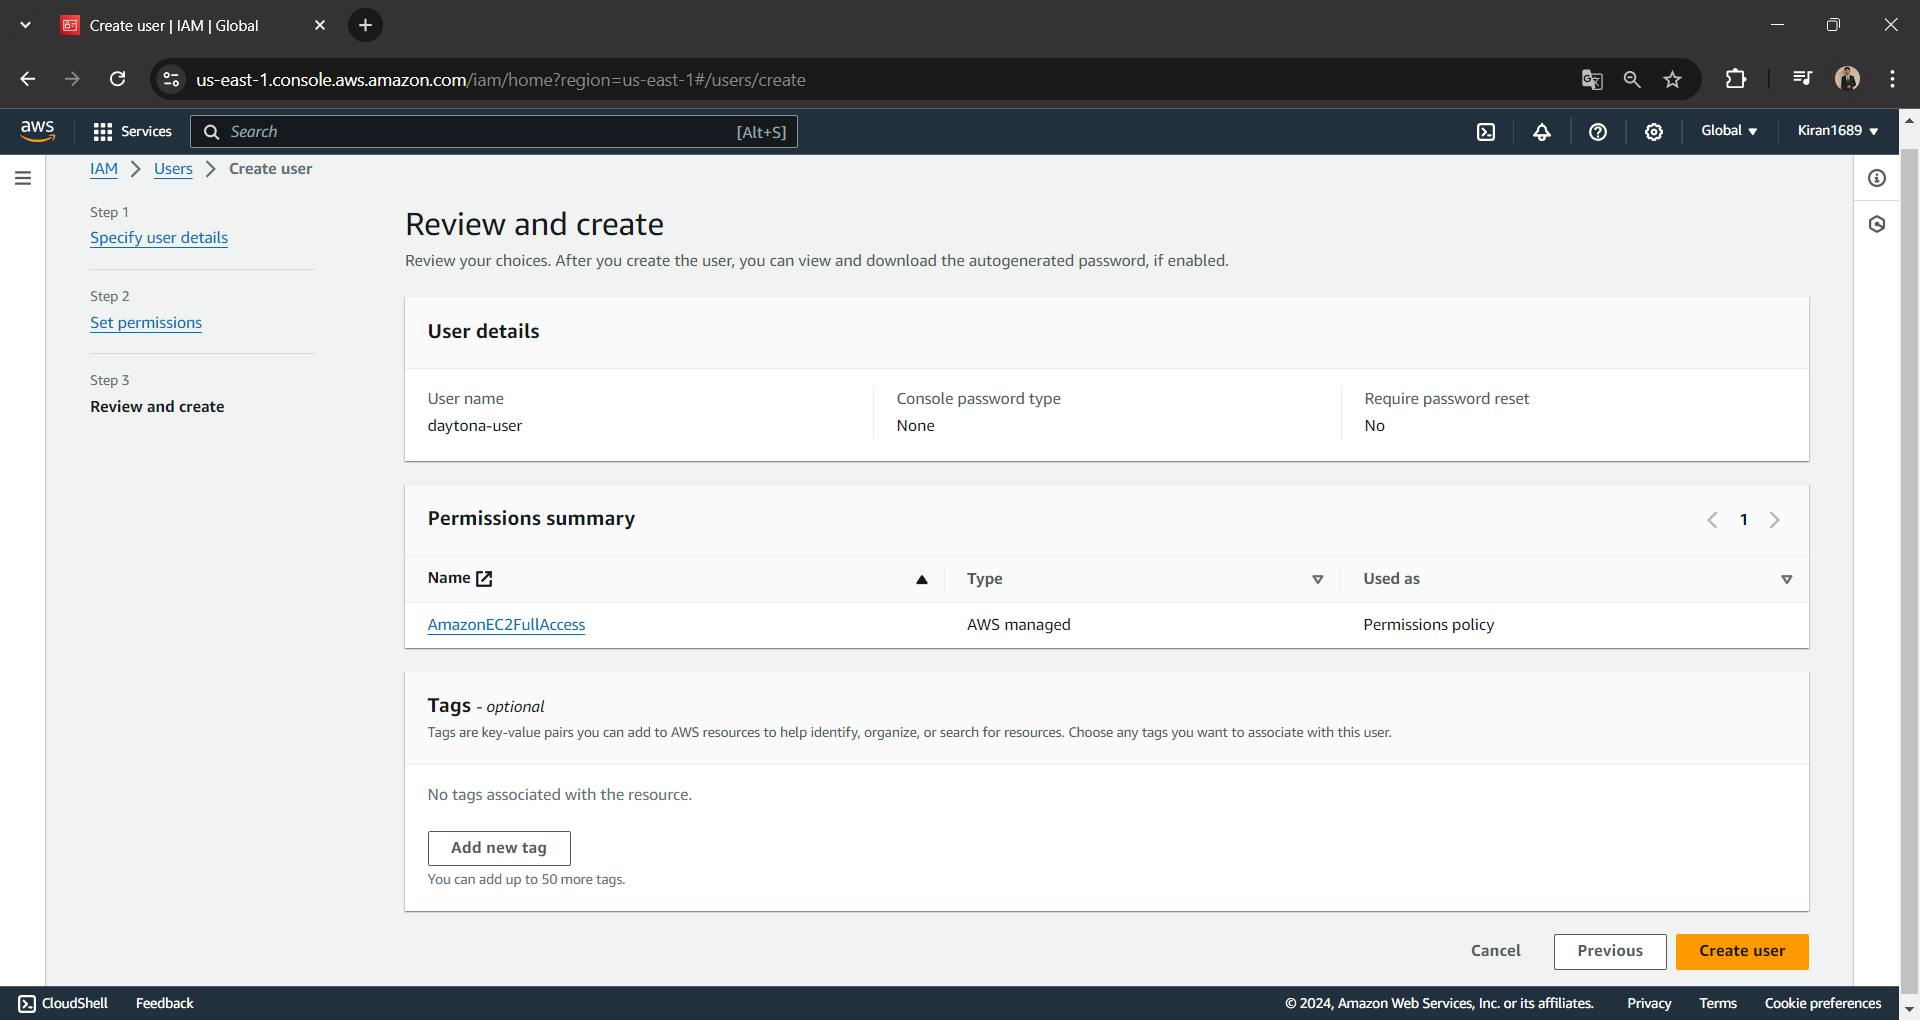
Step 1.5: Review the details and click "Create user."
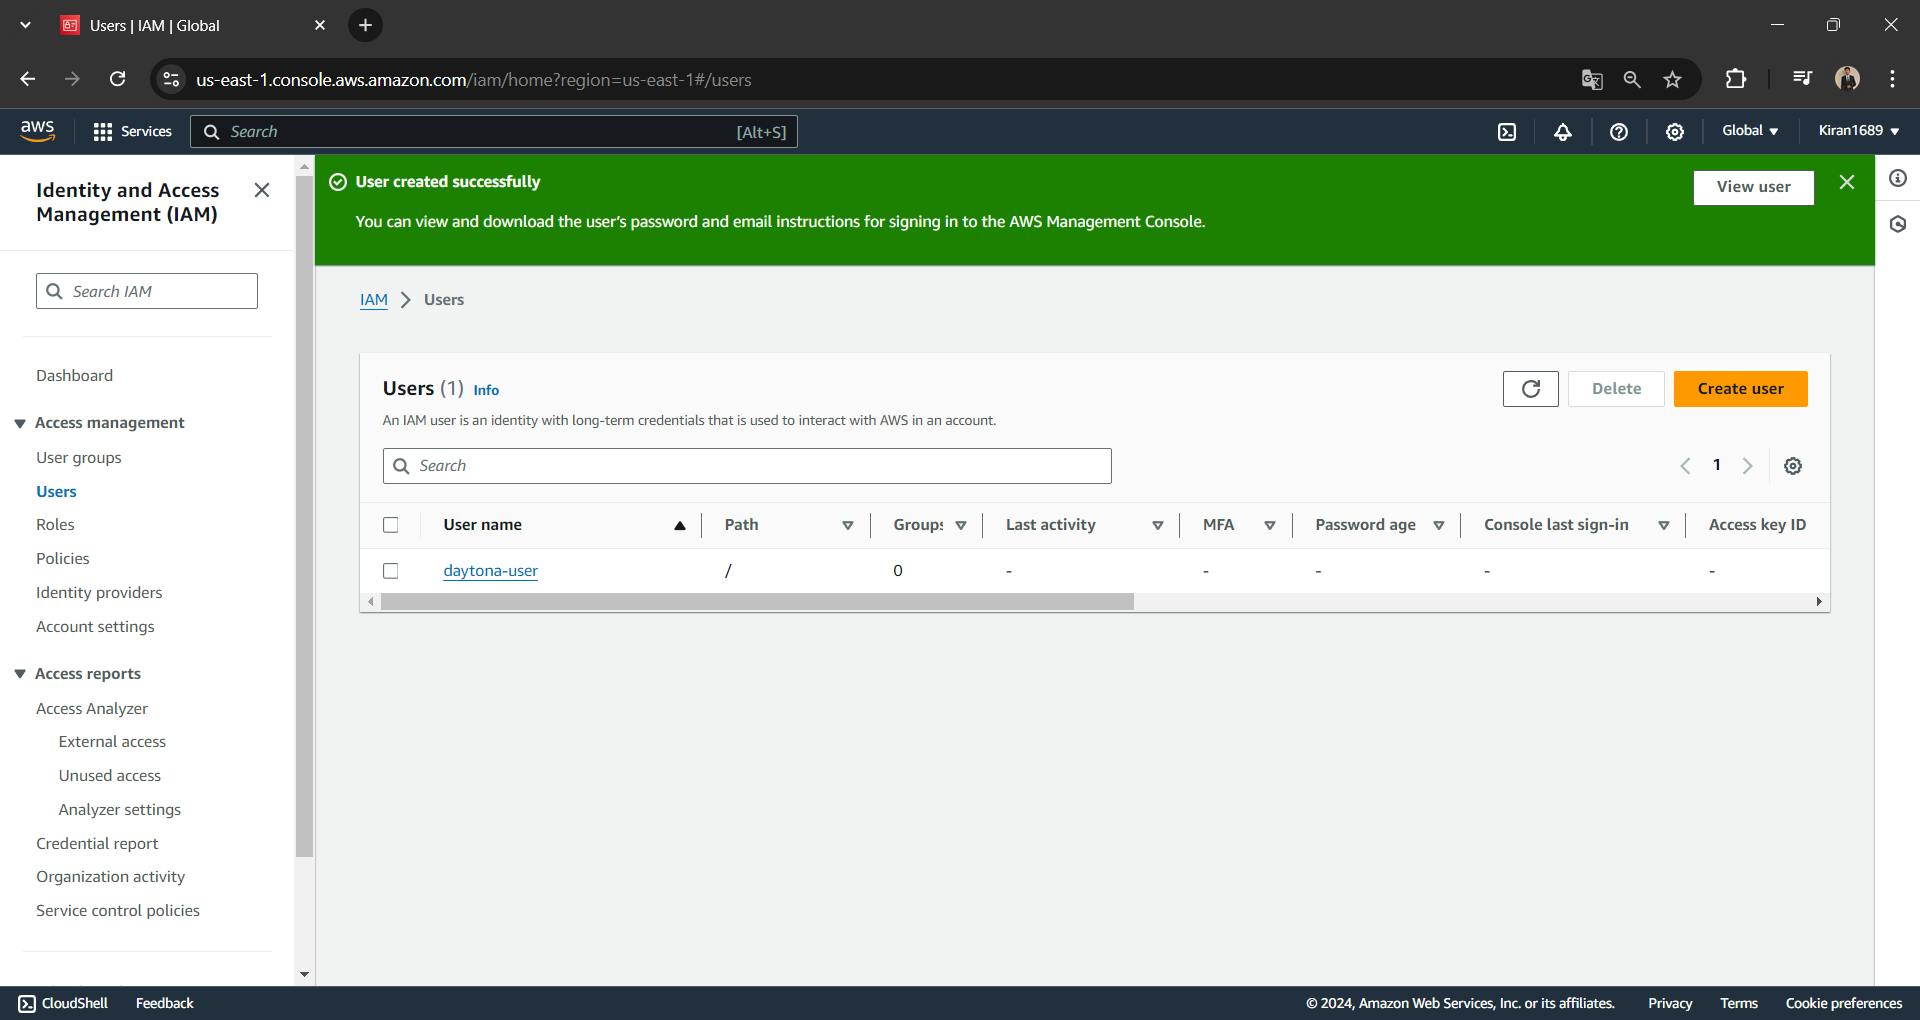
You successfully create a user. Now, You need to create ACCESS_KEY and SECRET for that user.
Step 1.6: Click on the username and Go to Security credentials
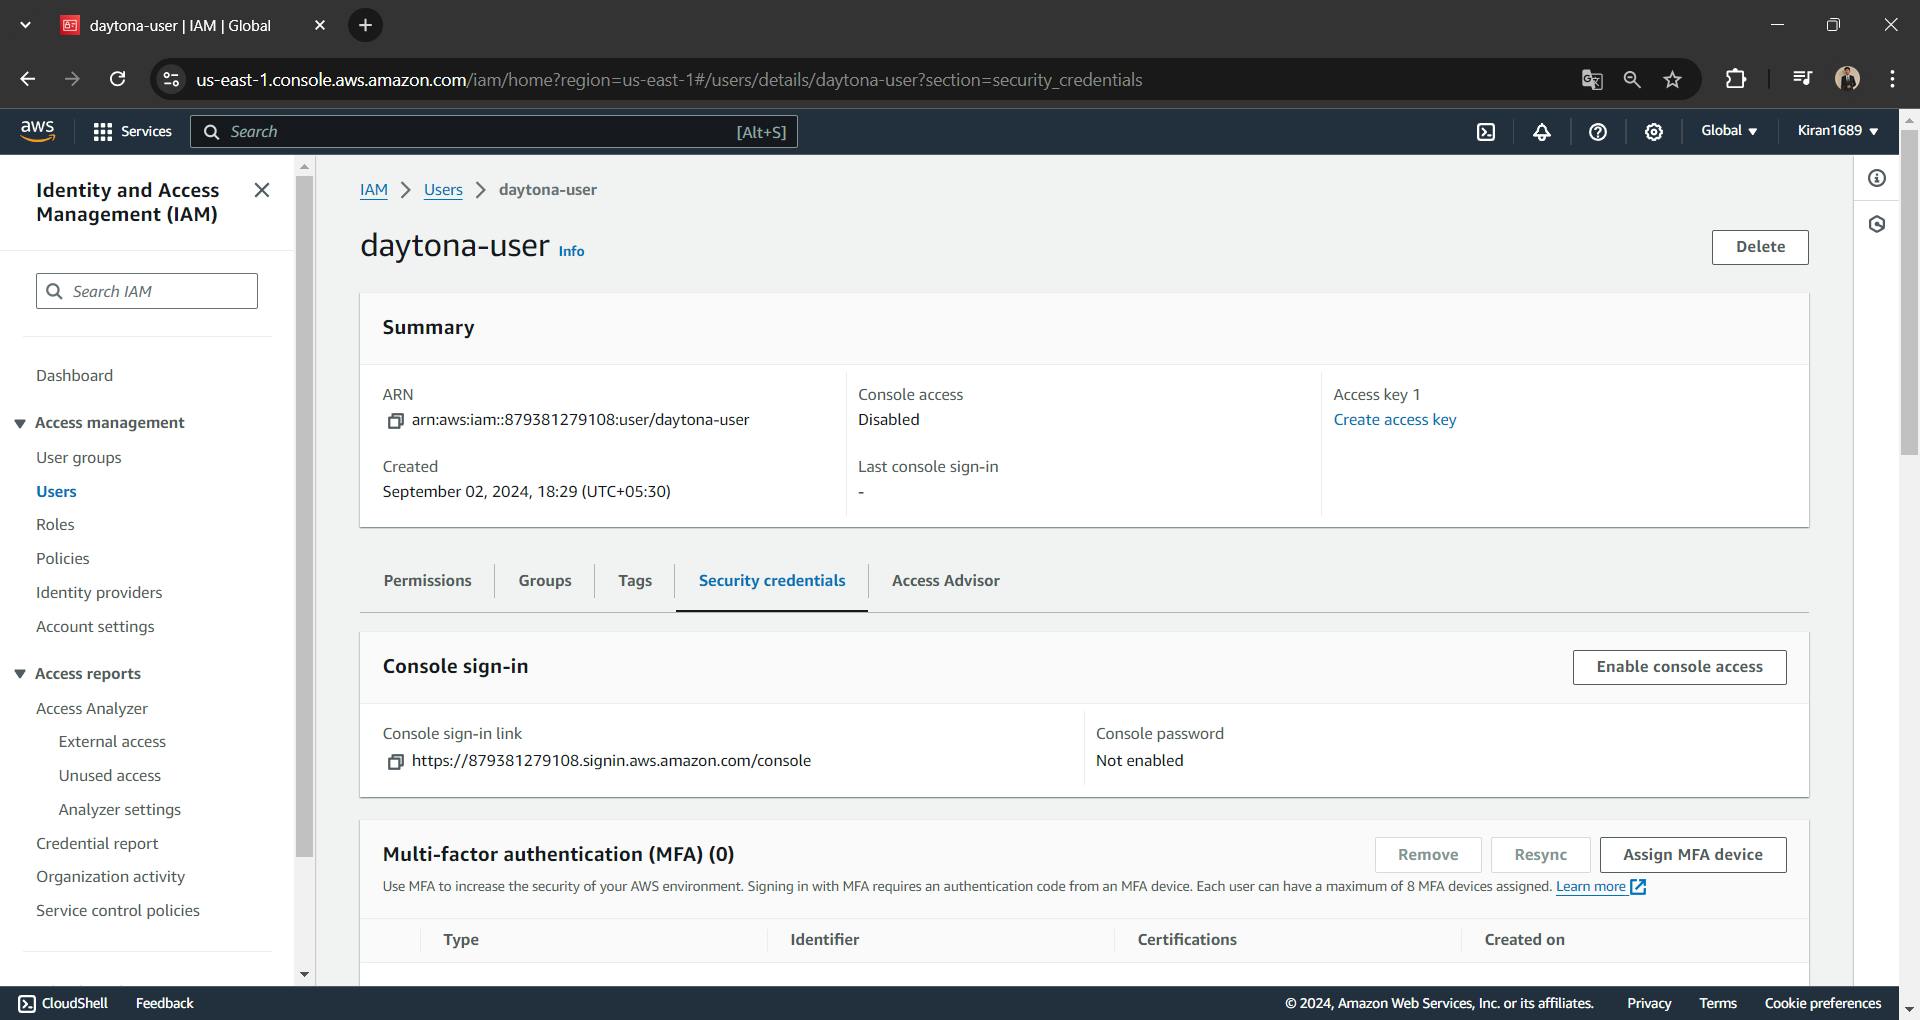
Step 1.7: Scroll down and click "Create access key."
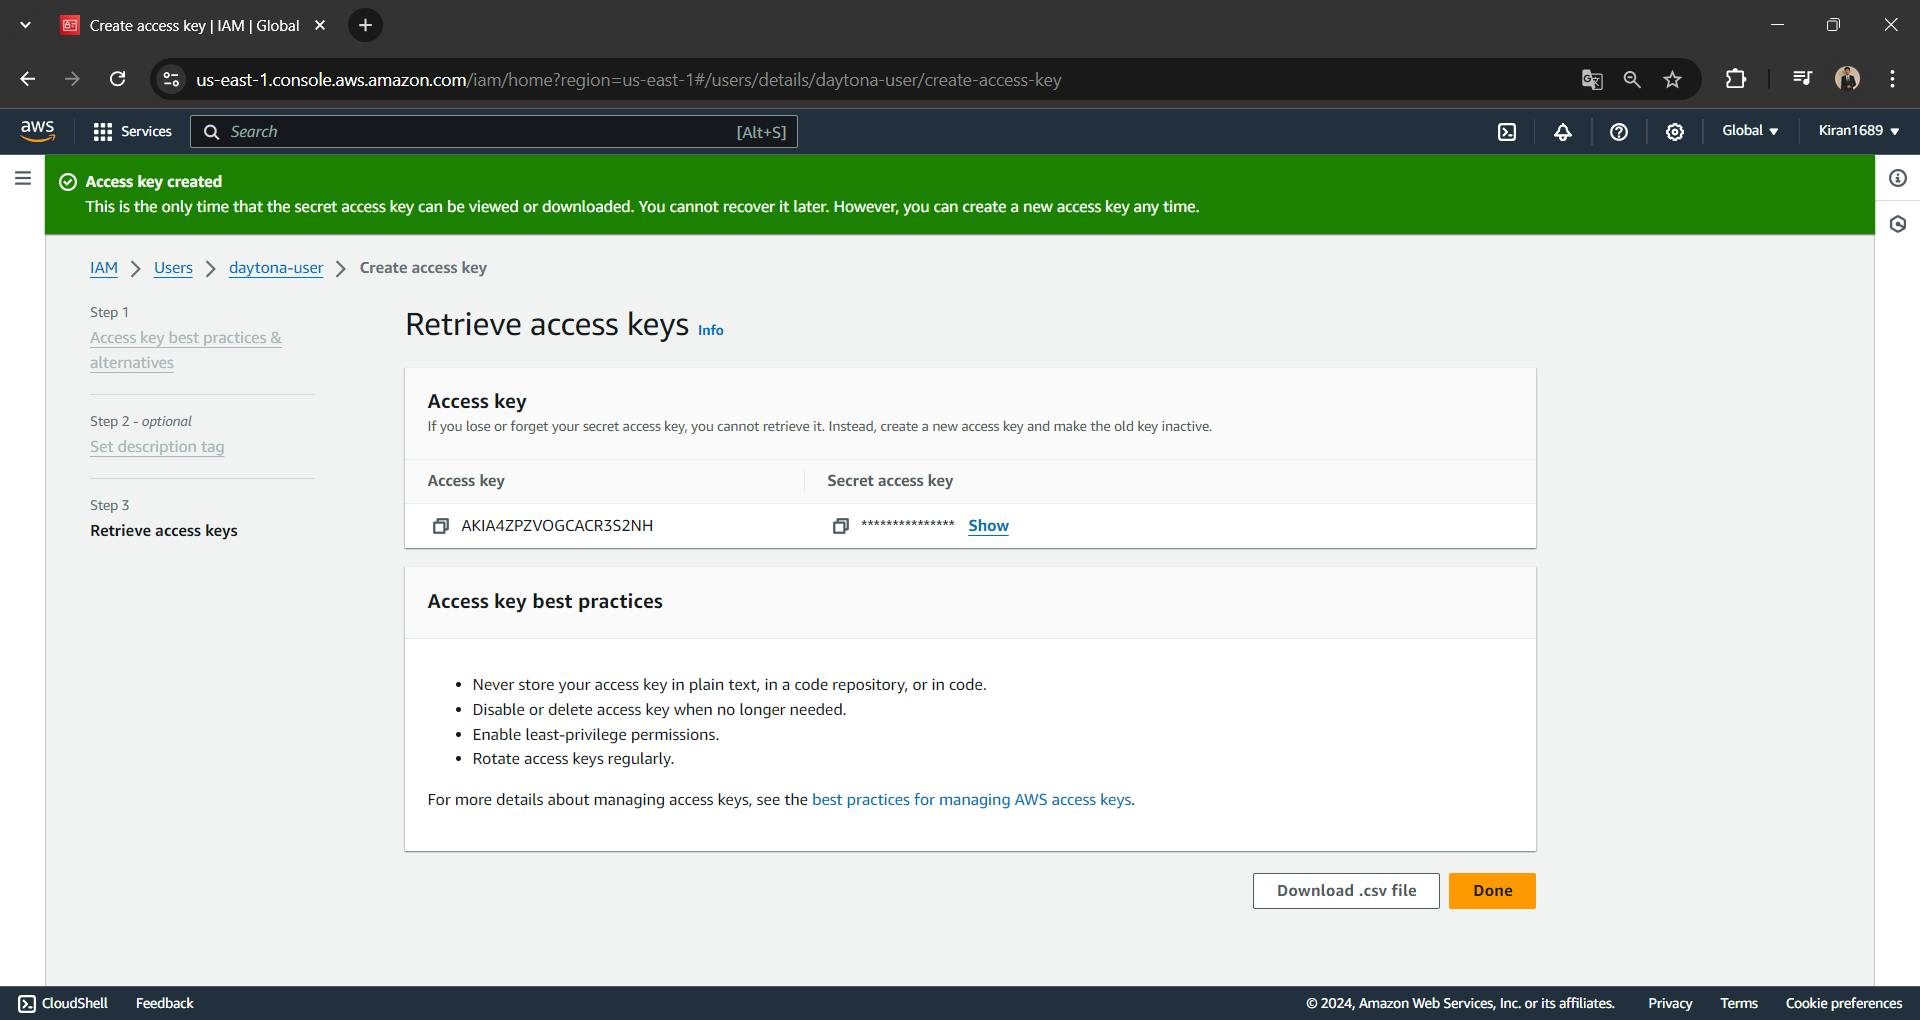
Step 1.8: Copy your credentials or you can download the csv file.
Now, you are ready to setup Daytona AWS Provider.
Step 2: Main Process
Step 2.1: Start Daytona Server
Start the daytona server by running the command
1daytona server
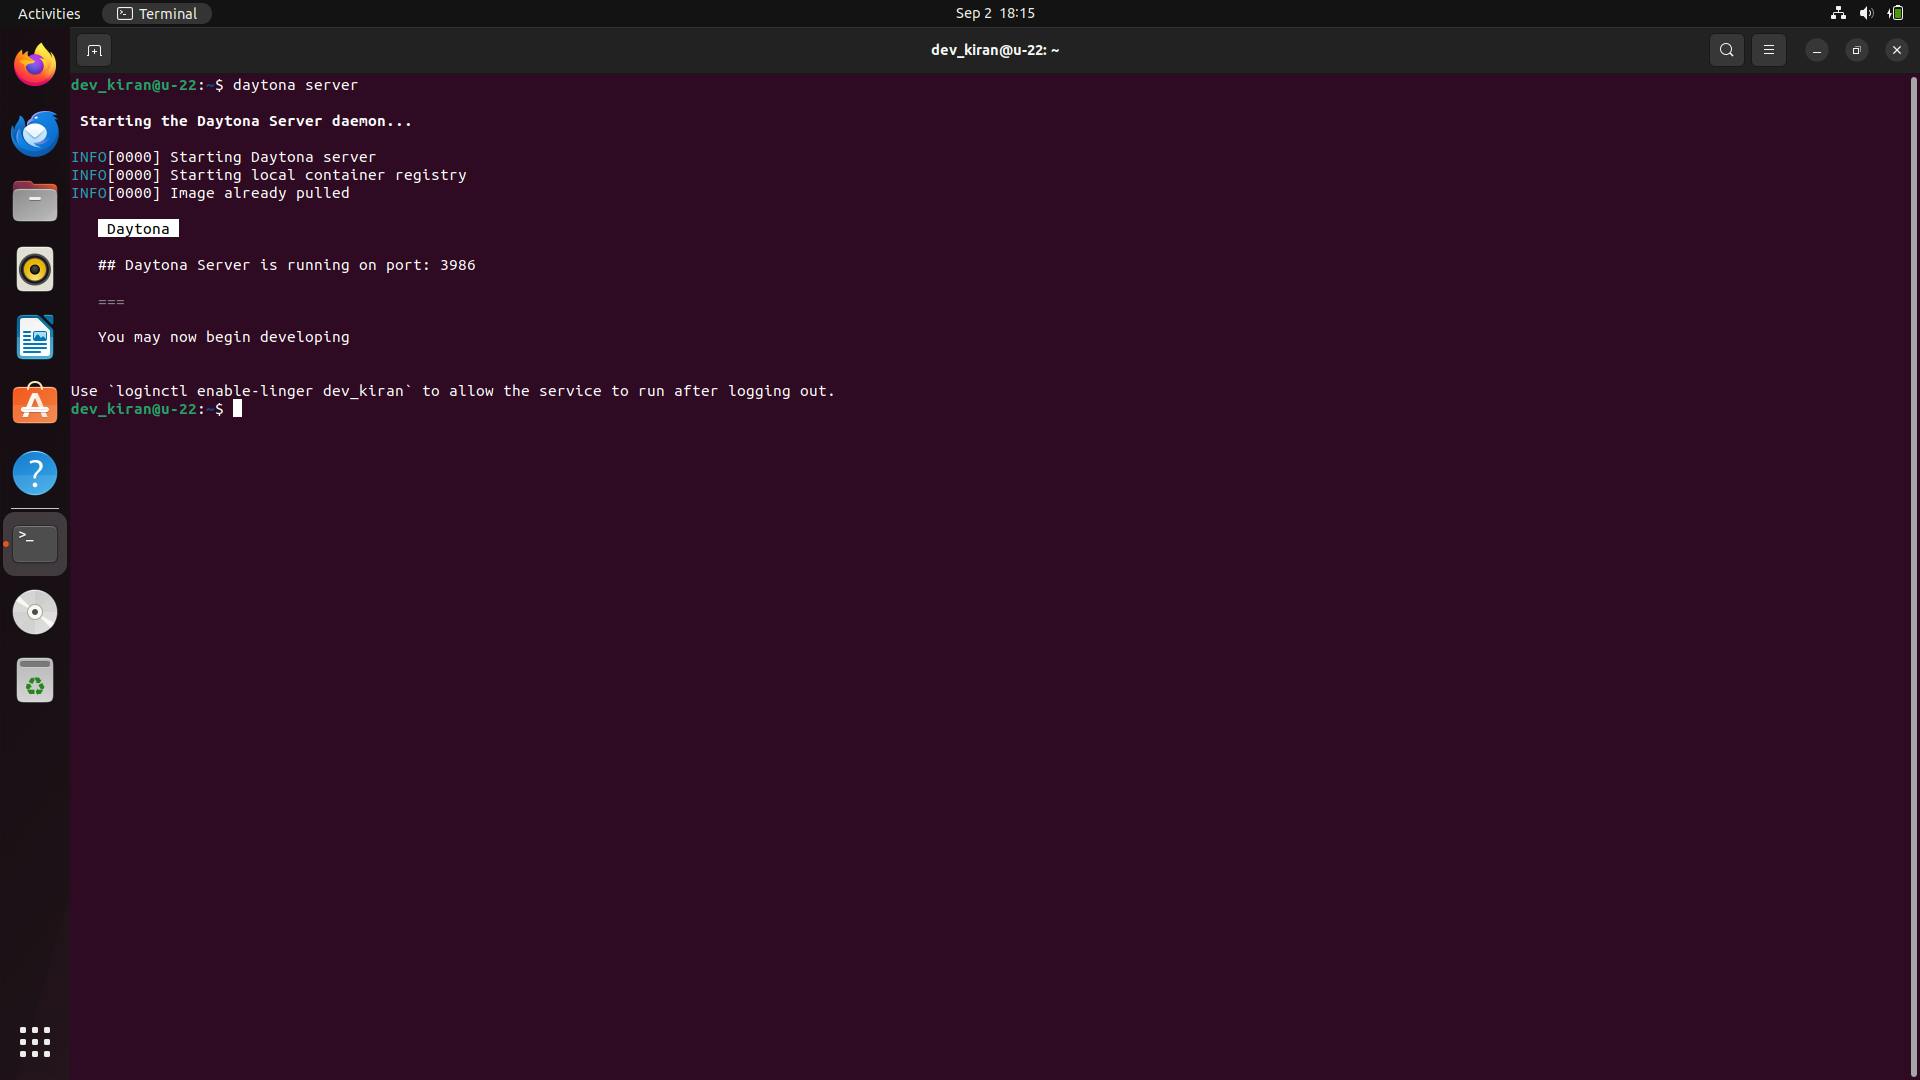
Step 2.2: Install the AWS Provider
Run the below command, You will be prompted to choose a provider. Select aws-provider from the list
1daytona provider install
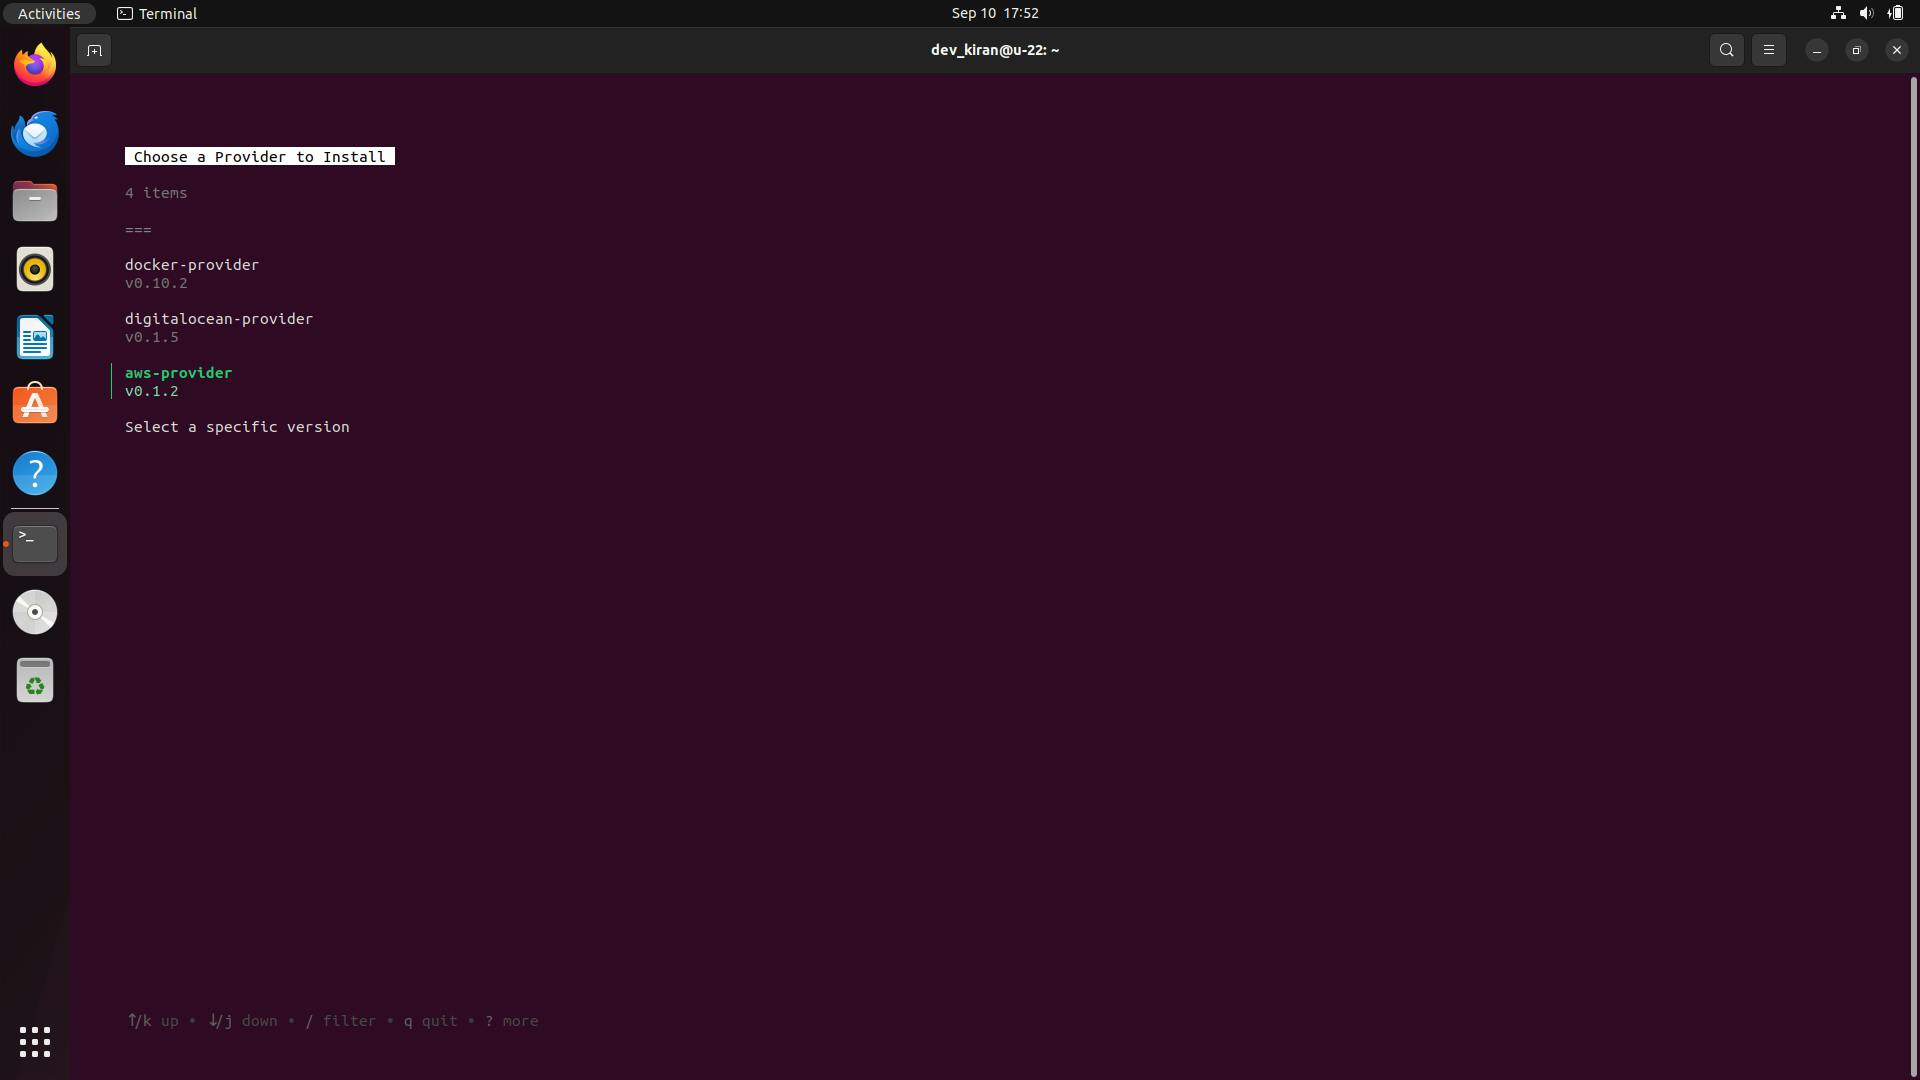
Step 2.3: Set the AWS Target
Run the following command to initiate the target setup process:
1daytona target set
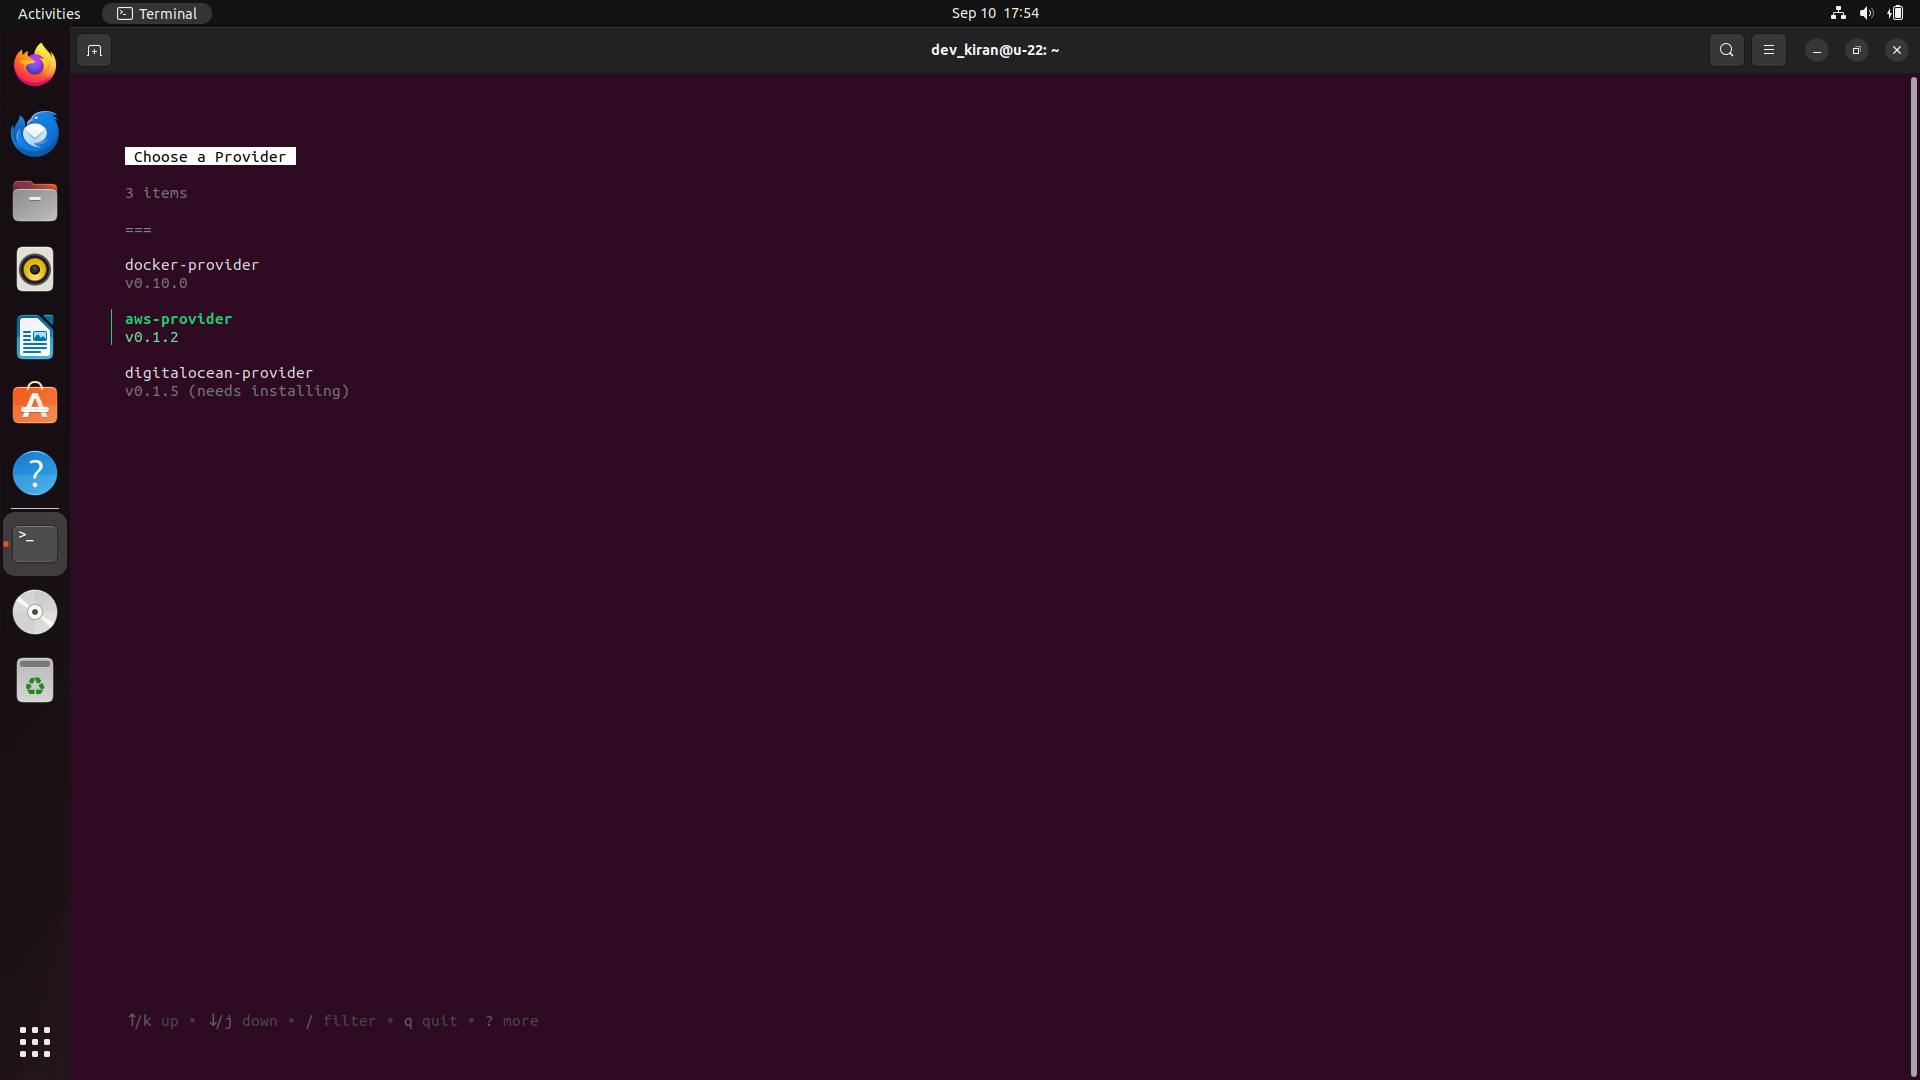
Step 2.3.1: Select the AWS Provider
You will be prompted to choose a provider. Select aws-provider from the list
Step 2.3.2: Create a New Target
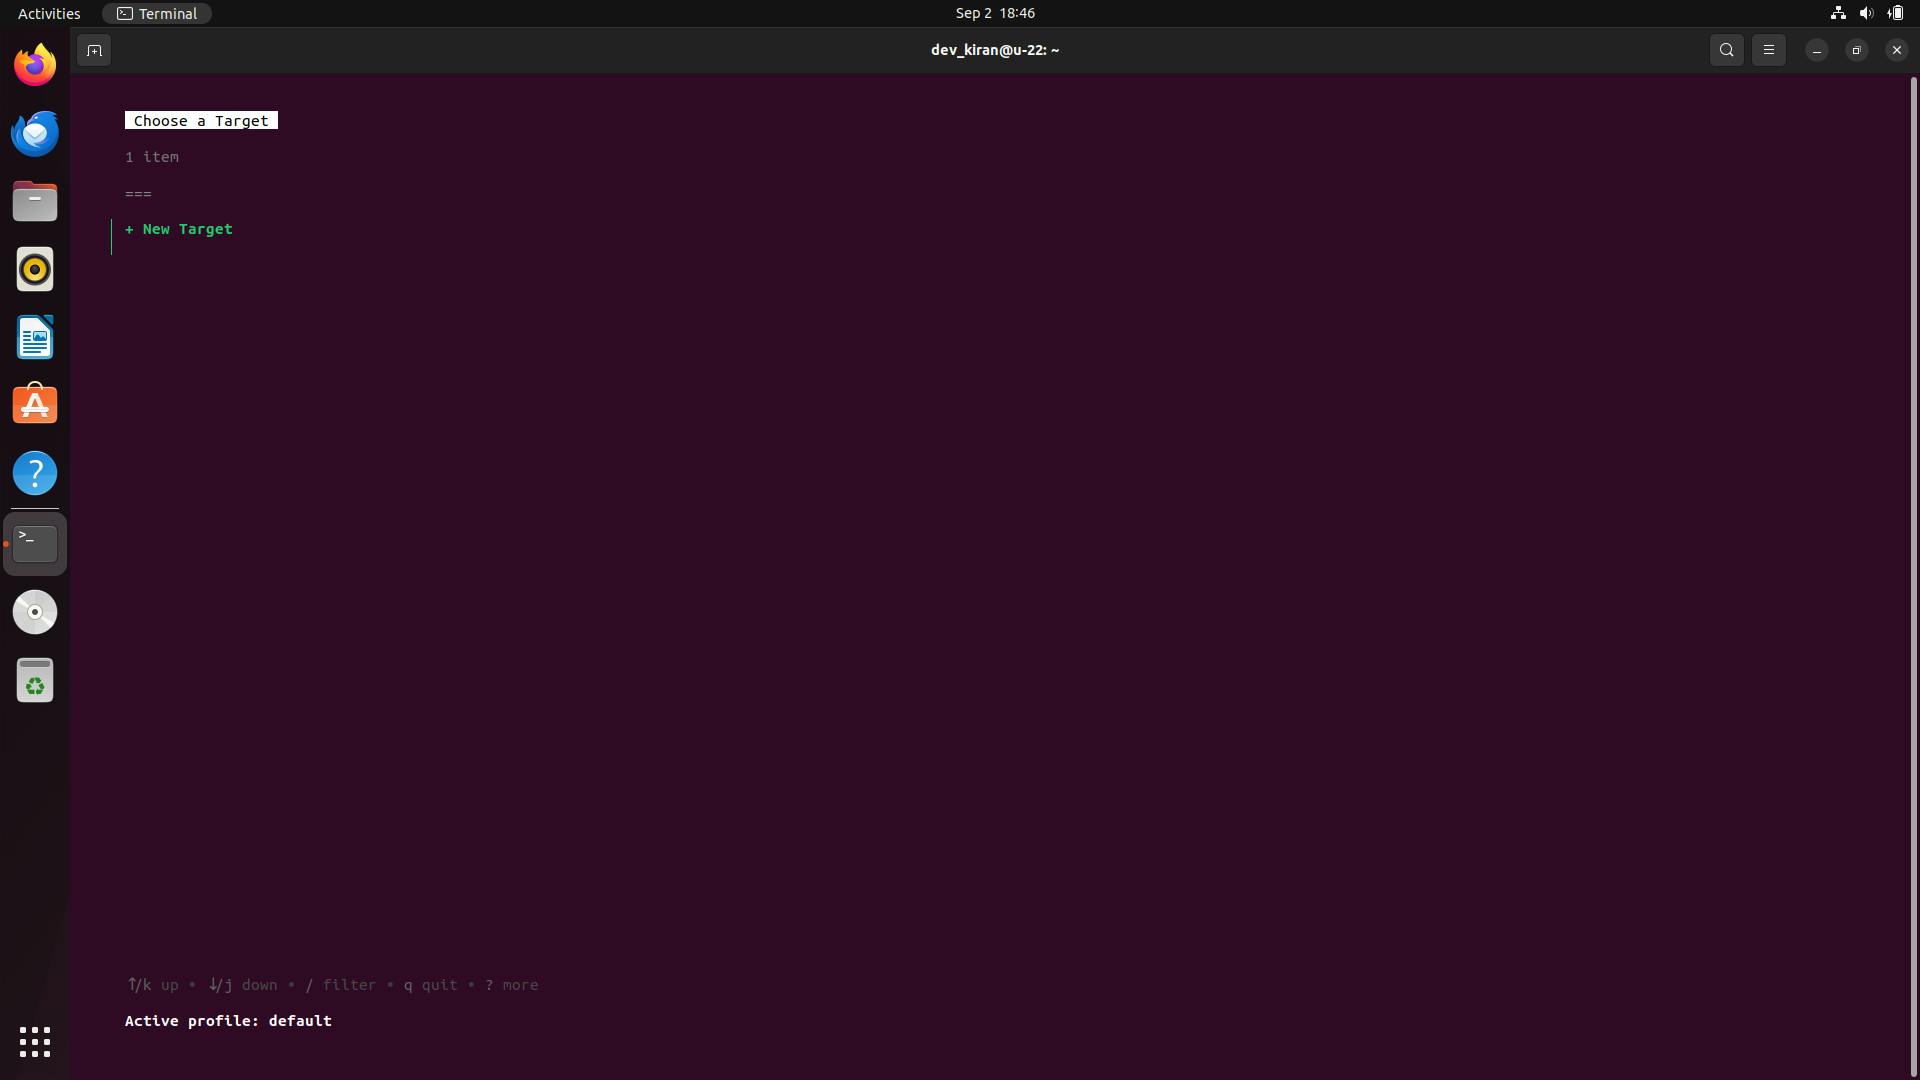
After selecting the AWS provider, choose to create a new target and enter a unique and descriptive name for your AWS target, e.g.:
1daytona-aws-target
Step 2.3.3: Configure AWS target options
You will be prompted to enter several configuration options specific to AWS. Daytona AWS Provider offers a range of target options that can be customized according to your requirements. Here’s a detailed overview:
Access Key Id:
Provide your Access Key Id you created for the user earlier.
If left empty, Daytona will fetch it from the AWS_SECRET_ACCESS_KEY environment variable.Device Name:
The device name for the volume. This is typically the root device name for specified AMI, you can either adjust this to your preferred values or press Enter to accept the default options. Get list of device names hereImage Id:
The ID of the Amazon Machine Image (AMI) to launch an instance. Default is ami-04a81a99f5ec58529. Click here to find AMI that meets your needs.Instance type:
The type of instance to launch. Default is t2.micro. Get the list of available instance types hereRegion:
The geographic area where AWS resources are hosted. Default is us-east-1. Get the list of available regions hereSecret Access Key:
Paste your Secret Access Key of the IAM user you created earlier. If empty, it will be fetched from the AWS_SECRET_ACCESS_KEY environment variable.Volume Size:
The size of the instance volume, in GB. Default is 20 GB. Get the list of volume size limits hereVolume Type:
The type of volume. Default is gp3. Get the list of available volume types here
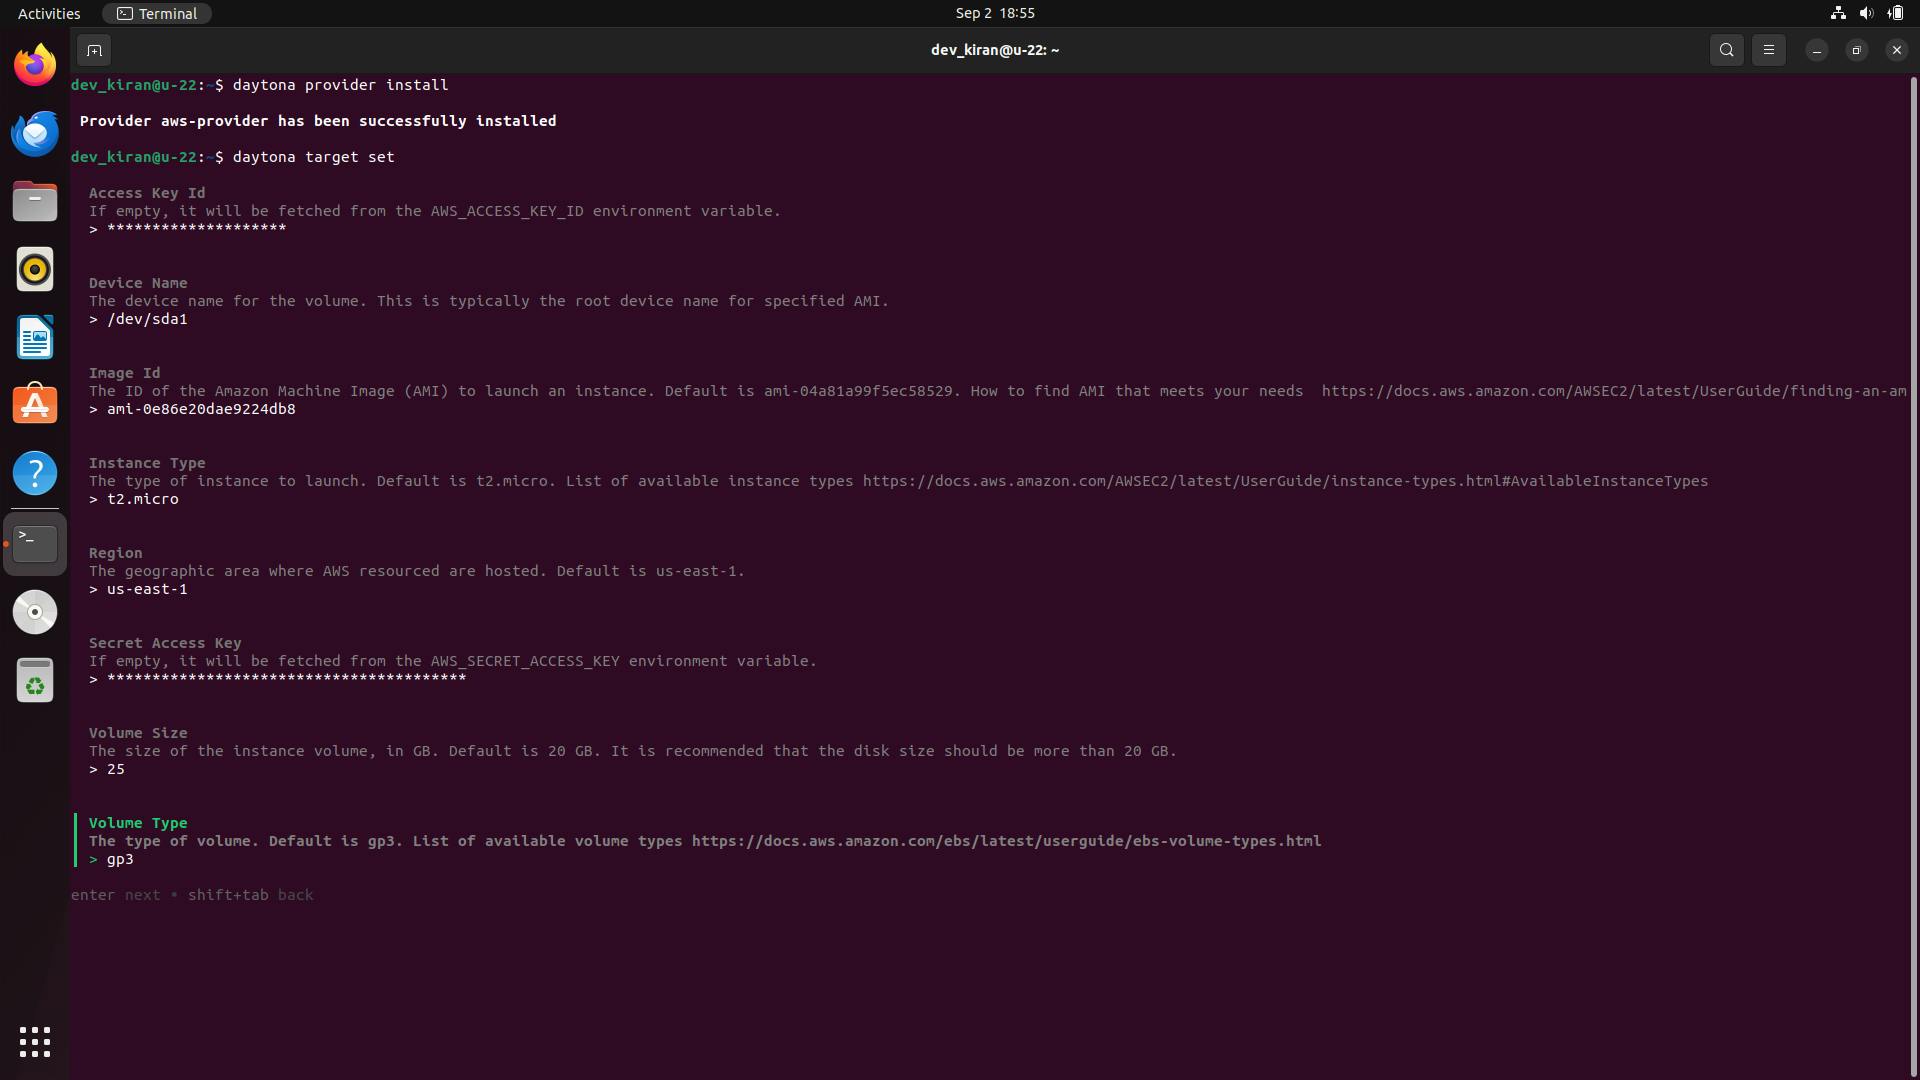
Click enter after filling all the details.
Congratulations, You have successfully setup and configured Daytona AWS Provider to create and manage workspace on your AWS EC2 instance.
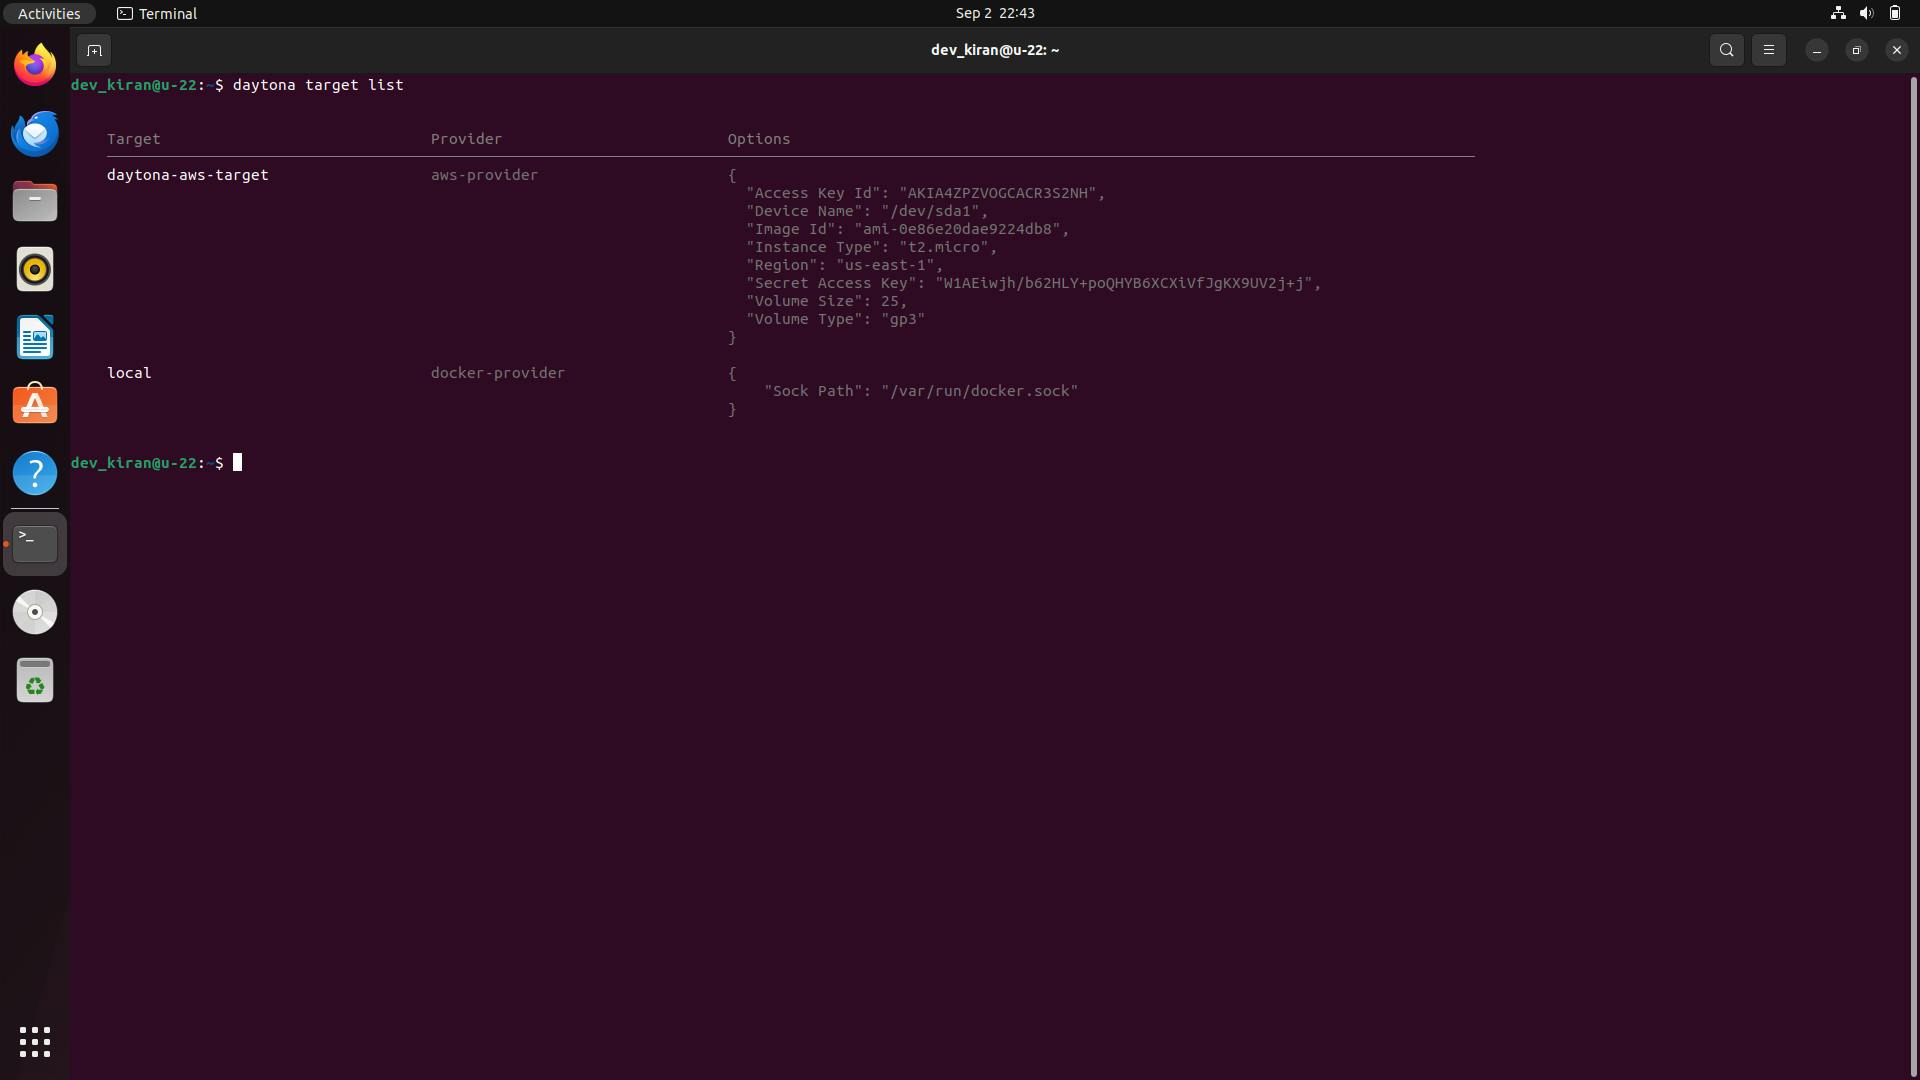
To verify daytona AWS provider has been successfully installed or not, run the below command you will get provider and target configuration information you have configured.
Common Issues and Troubleshooting
While setting up and configuring the AWS Provider with Daytona, you may encounter some common issues. Below are troubleshooting tips to help resolve them:
Problem: Daytona Provider Errors
Solution: If Daytona encounters errors while interacting with the AWS Provider, it could be due to bugs or limitations in the recent release. Checking the Daytona AWS Provider GitHub repository for any known issues or updates can help resolve these problems. Additionally, consider updating to the latest version if you're using an outdated release.
Problem: Invalid AWS Credentials
Solution: If you encounter an error related to AWS credentials, double-check your access_key_id and secret_access_key. Ensure that these credentials are correct and have the necessary permissions.
Problem: Insufficient IAM Permissions
Solution: If you encounter "Access Denied" errors, verify that the IAM user has the necessary permissions, such as AmazonEC2FullAccess. You can update the user’s permissions via the IAM Management Console by attaching the required policies or creating a custom policy with the needed permissions.
Problem: EC2 Instance Launch Failure
Solution: This issue might occur due to incorrect instance type, AMI ID, or security group configurations. Ensure the AMI ID matches the region you are deploying to, and the instance type is supported in that region. Also, verify that the security group allows necessary inbound and outbound traffic.
Problem: Region-Specific Issues
Solution: AWS services and resources availability can vary by region. If you face issues related to resource availability, check if the service or instance type is available in the selected region. You might need to switch to a different region where the resource is supported.
Conclusion
By following this guide, you have successfully set up and configured the Daytona AWS Provider to manage EC2 workspaces. This setup allows you to leverage AWS’s powerful infrastructure for your development and deployment tasks.
For the latest information, refer to the official Daytona documentation.


