Setting up any Dev Environment is usually painful, but the pain instantly doubles when you have to set it up on a remote machine. But why should you work on a remote machine?
There are many reasons: the size of the machine (for complex builds, dependencies, data locality, or running large ML/AI models), security, your employer needs the code in their data center, you're on the go with your iPad or Chromebook, or you're just tinkering with a Raspberry Pi.
No matter your reason, we wanted to make an easy step-by-step guide to let you set up a standardized, collaborative, and secure dev environment – essentially giving you a Codespaces-like experience on any machine.
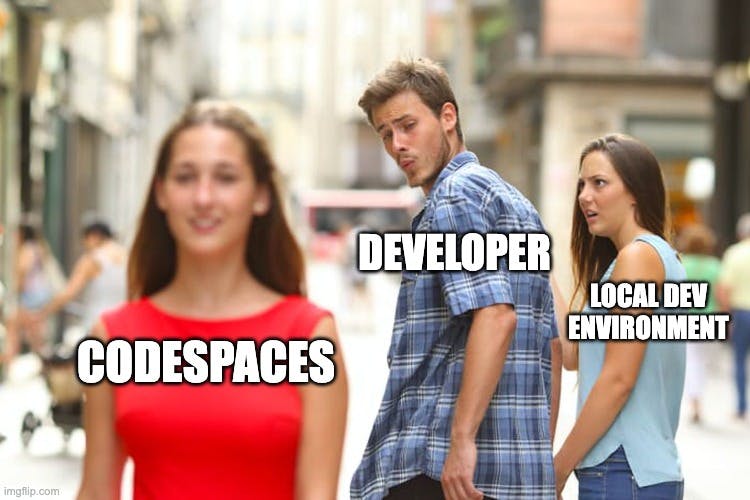
Setting up a remote development environment can streamline your workflow and enhance collaboration. Instead of relying on a proprietary service like Codespaces, this guide will walk you through the process of creating your own custom remote dev environment on a Linux server.
There are many ways to go about it, but for this guide, we will assume you will use Visual Studio Code and leverage Docker containers to isolate dependencies and services needed for development.

Prerequisites
To follow this guide and set up your own remote dev environment, you will need:
A Linux server running Ubuntu 20.04+ with at least 2 GB of RAM and 2 CPU cores. This can be a virtual private server (VPS) from a cloud provider or maybe even a Raspberry Pi.
Admin/root access to the server to install software.
We will assume your local machine runs a MacOS or Linux variant (maybe even a WSL), if you are using Windows be sure to adapt some commands but everything should work as advertised.
A Visual Studio Code on your local machine.
Basic knowledge of command line interfaces and experience with Docker is helpful.
Some courage.
Step 1a - Provision Linux Server
First, you'll need to provision a Linux server that will host your remote development environment.
While you can repurpose an existing server, starting fresh helps avoid conflicts. Provision an Ubuntu 20.04 server with at least 2 GB RAM and 2 CPU cores from your preferred hosting provider.
Many cloud providers like AWS, GCP, Azure, and DigitalOcean allow instant provisioning of Ubuntu VPS instances at reasonable prices. Some of them even provide a complimentary initial credit; for instance, Digital Ocean offers credit for the first 60 days.
For example, Oracle offers a free-tier cloud account that allows you to utilize 4 cores ARM machine and up to 24GB of memory. Just prepare to be patient, as registering and setting up your account will require some effort.
A Raspberry Pi also works well if you want to save costs and don't need significant compute resources. Install the latest Raspberry Pi OS (formerly Raspbian) on compatible Pi hardware. To be honest, we haven't attempted it, but if you decide to try it, please let us know.
Once your Linux server is up and running, SSH into it to begin setup.
Step 1b - Generate SSH Keys (optional)
If you haven't already configured your SSH keys, we'll need to create them to establish a secure connection to the remote server.
Based on the remote server you're using, you'll need to prepare your SSH keys for the provisioning process so that you can input them into the dashboard of your preferred cloud provider. Alternatively, you can initially configure your server using a password and then add the SSH keys by following the instructions in the second section below.
1### On your local machine:23# Open a terminal and generate a keypair:4ssh-keygen -t rsa56# Save the private and public keys in the default location.78# Copy the public key:9cat ~/.ssh/id_rsa.pub1011### On the remote server:1213# Log in and create an .ssh folder:14mkdir .ssh1516# Create an authorized_keys file and paste your public key:17nano .ssh/authorized_keys1819# Set permissions:20chmod 700 .ssh21chmod 600 .ssh/authorized_keys
Now, you can SSH into the server without a password using the private key.
1ssh user@your-server-ip
Step 2 - Install Docker
Since we will leverage Docker to isolate and run services needed for development, Docker Engine is essential. Follow the official Docker install directions for Ubuntu to get up and running.
With SSH set up, let's install Docker on the remote server:
1# Update package lists2sudo apt update34# Install Docker prerequisites5sudo apt install apt-transport-https ca-certificates curl software-properties-common67# Add Docker's GPG key8curl -fsSL https://download.docker.com/linux/ubuntu/gpg | sudo gpg --dearmor -o /usr/share/keyrings/docker-archive-keyring.gpg910# Set up the Docker apt repository11echo "deb [arch=amd64 signed-by=/usr/share/keyrings/docker-archive-keyring.gpg] https://download.docker.com/linux/ubuntu focal stable" | sudo tee /etc/apt/sources.list.d/docker.list > /dev/null1213# Install Docker14sudo apt update15sudo apt install docker-ce docker-ce-cli containerd.io
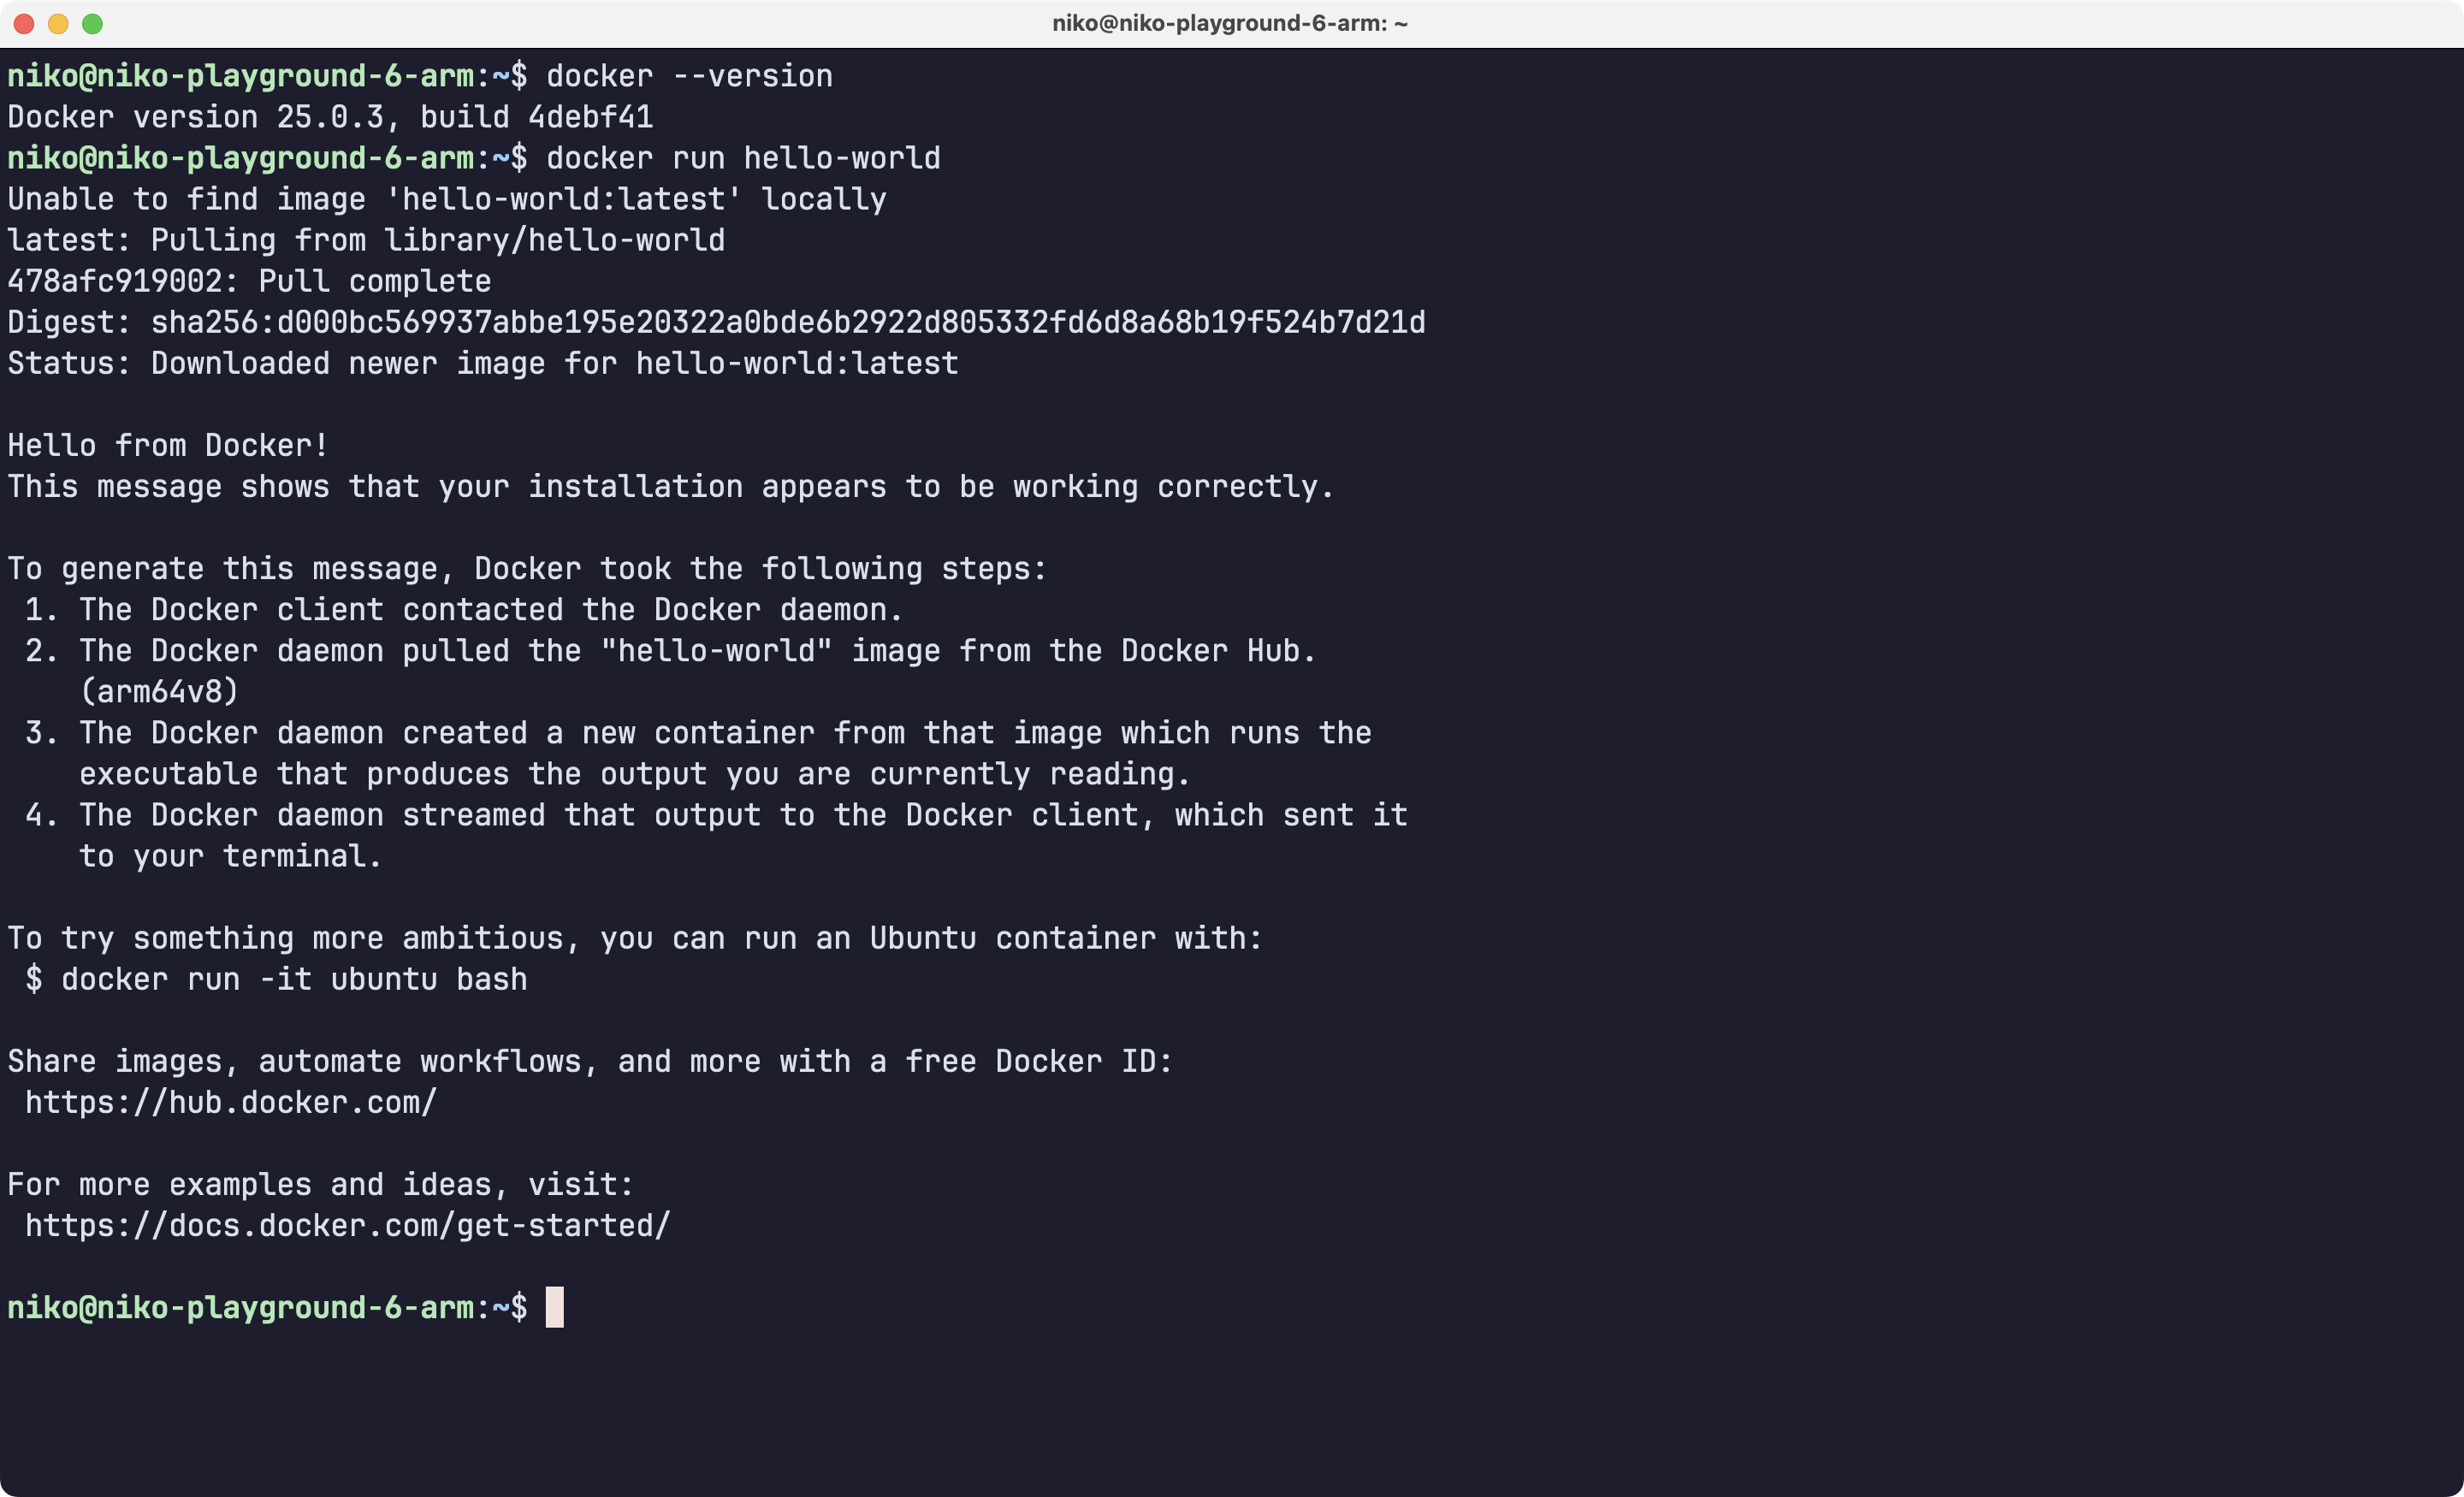
Check it worked:
1docker --version2docker run hello-world
This should successfully download a test container image and print a confirmation message. If the last command encounters a permission error, attempt to run it again using sudo before the command.
While optional, Docker Compose makes working with multi-container apps much easier. We'll use it later to orchestrate our dev environment services.
First things first, ensure Docker Compose is properly installed by confirming the version number.
1docker compose version
If that is not the case, install Docker Compose it with the following commands.
1sudo apt-get update2sudo apt-get install docker-compose-plugin
Add your user to the docker group by using a terminal to run:
1sudo usermod -aG docker $USER
Please log out and then log back in to ensure that the changes to the settings are applied.
Adding your username to the Docker group in a Linux system is a common practice to allow non-root users to run Docker commands without needing to use sudo each time. By default, Docker requires elevated privileges, and running Docker commands as a regular user without proper permissions would result in permission-denied errors.
Step 3 - Connect Visual Studio Code to Remote Environment
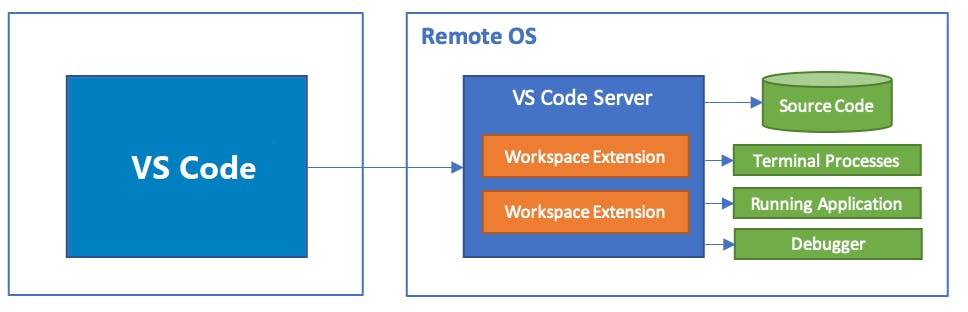
To allow connecting to your remote dev environment from Visual Studio Code, we need to install VS Code Server. The Visual Studio Code Server is a service designed to operate on a remote development environment, such as your cloud virtual machine (VM). This will run on the remote host and communicate with the VS Code client on our local machine.
Back on our local machine, launch VS Code and install the Remote - SSH extension.
Use the Command Palette (Ctrl/Cmd+Shift+P or F1) in VS Code to run Remote-SSH: Connect to Host... and enter your server info user@your-server-ip from the last step.
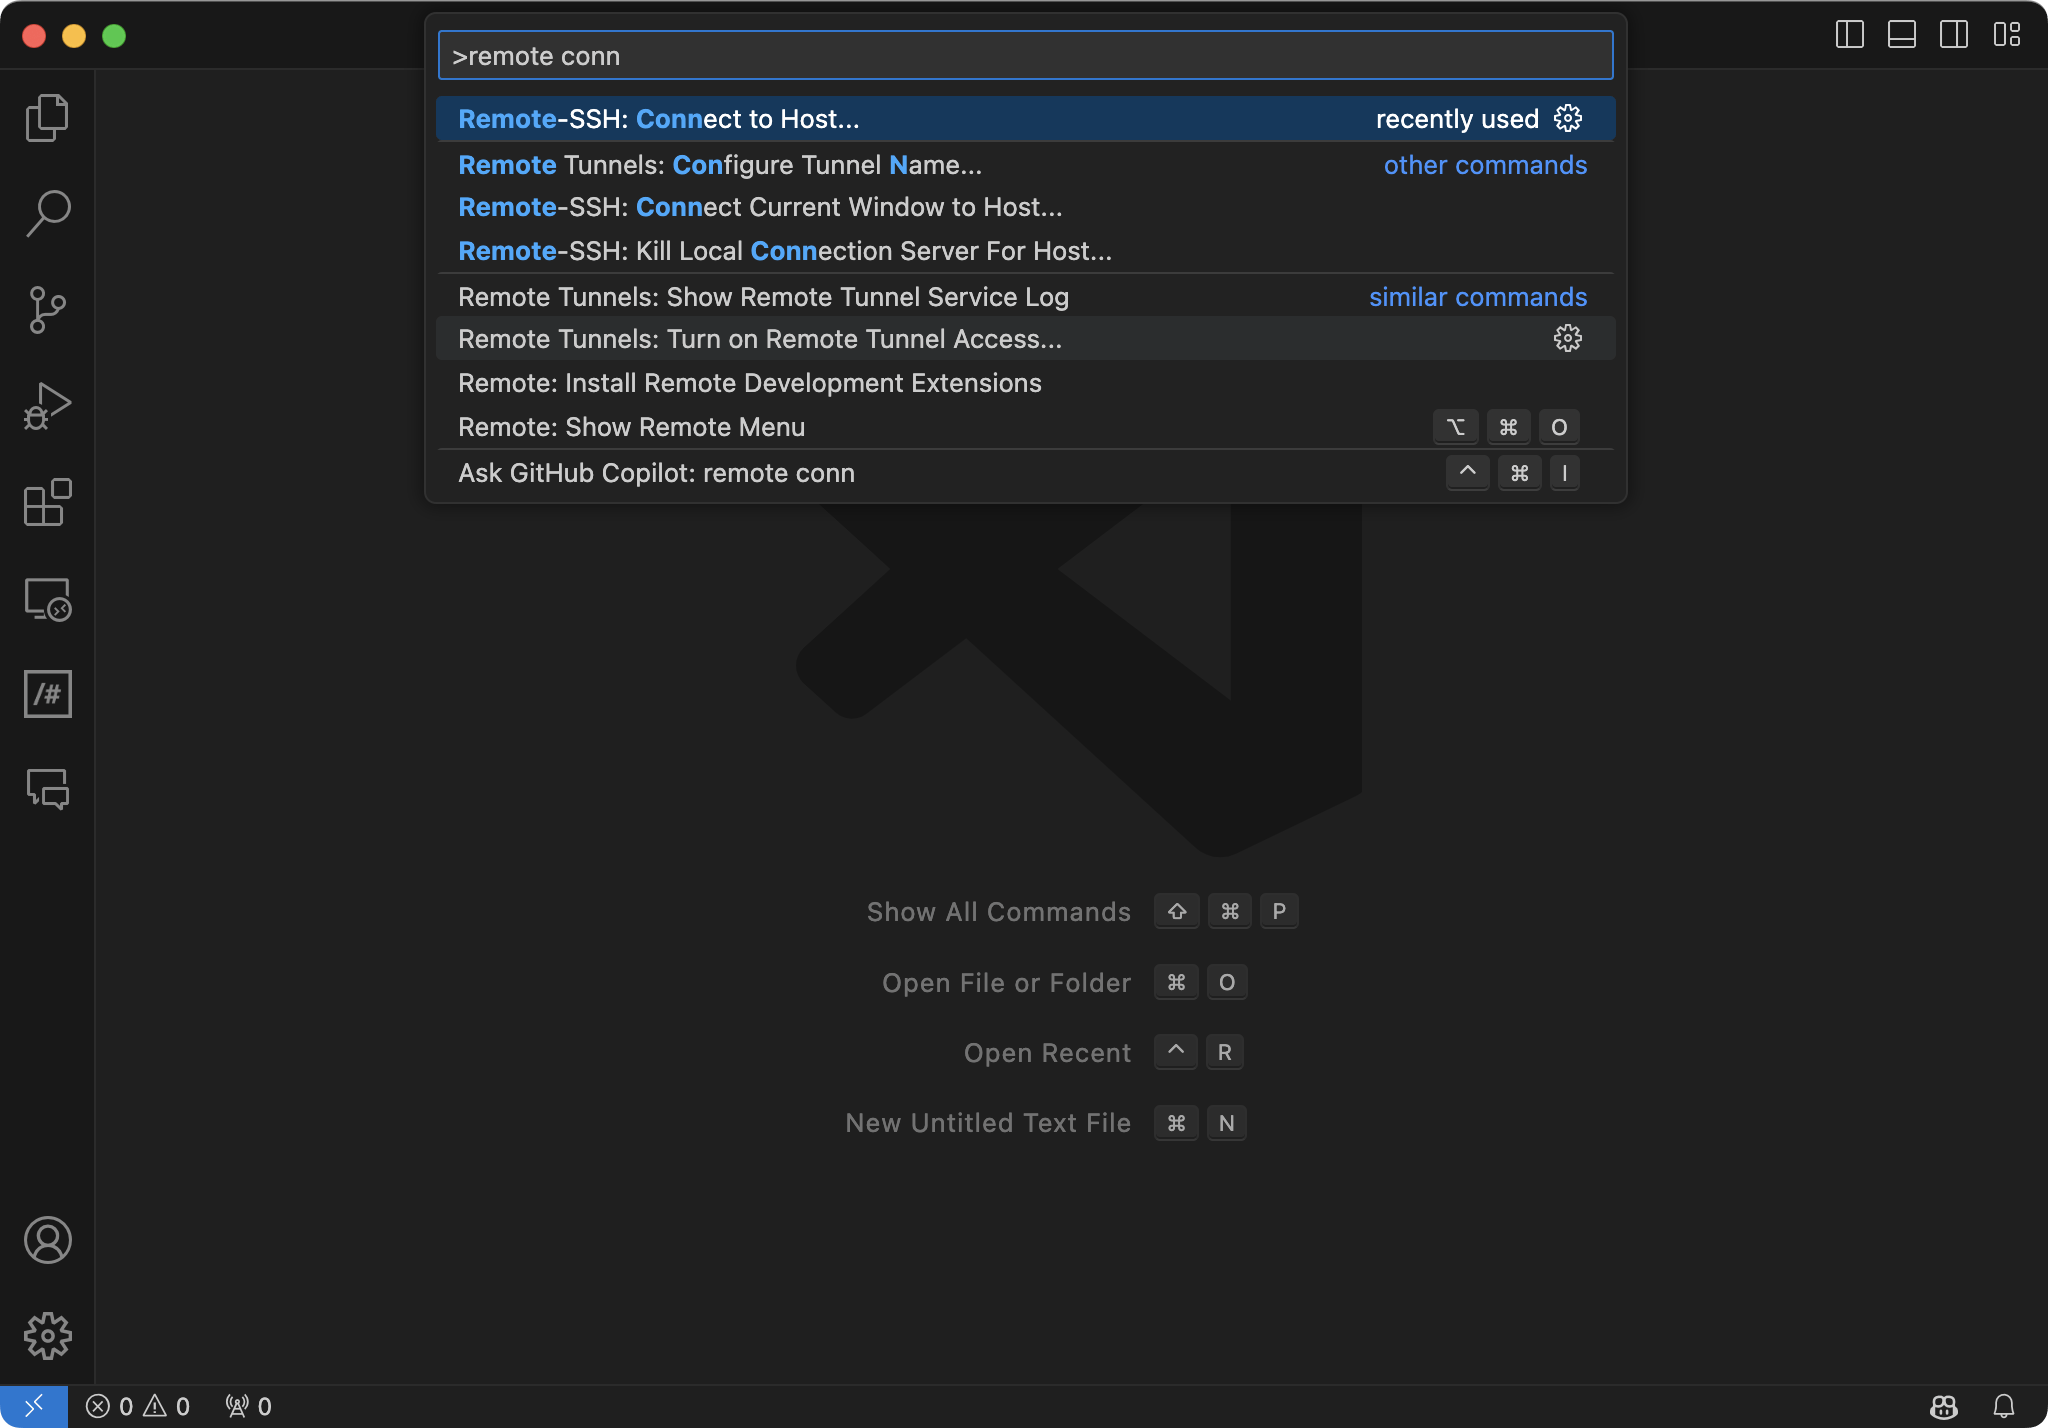
Once connected, VS Code will automatically install the VS Code Server on your remote machine.
You now have full VS Code functionality on the remote server, you can open folders and work directly on the remote server!

Step 4 - Clone Sample Project
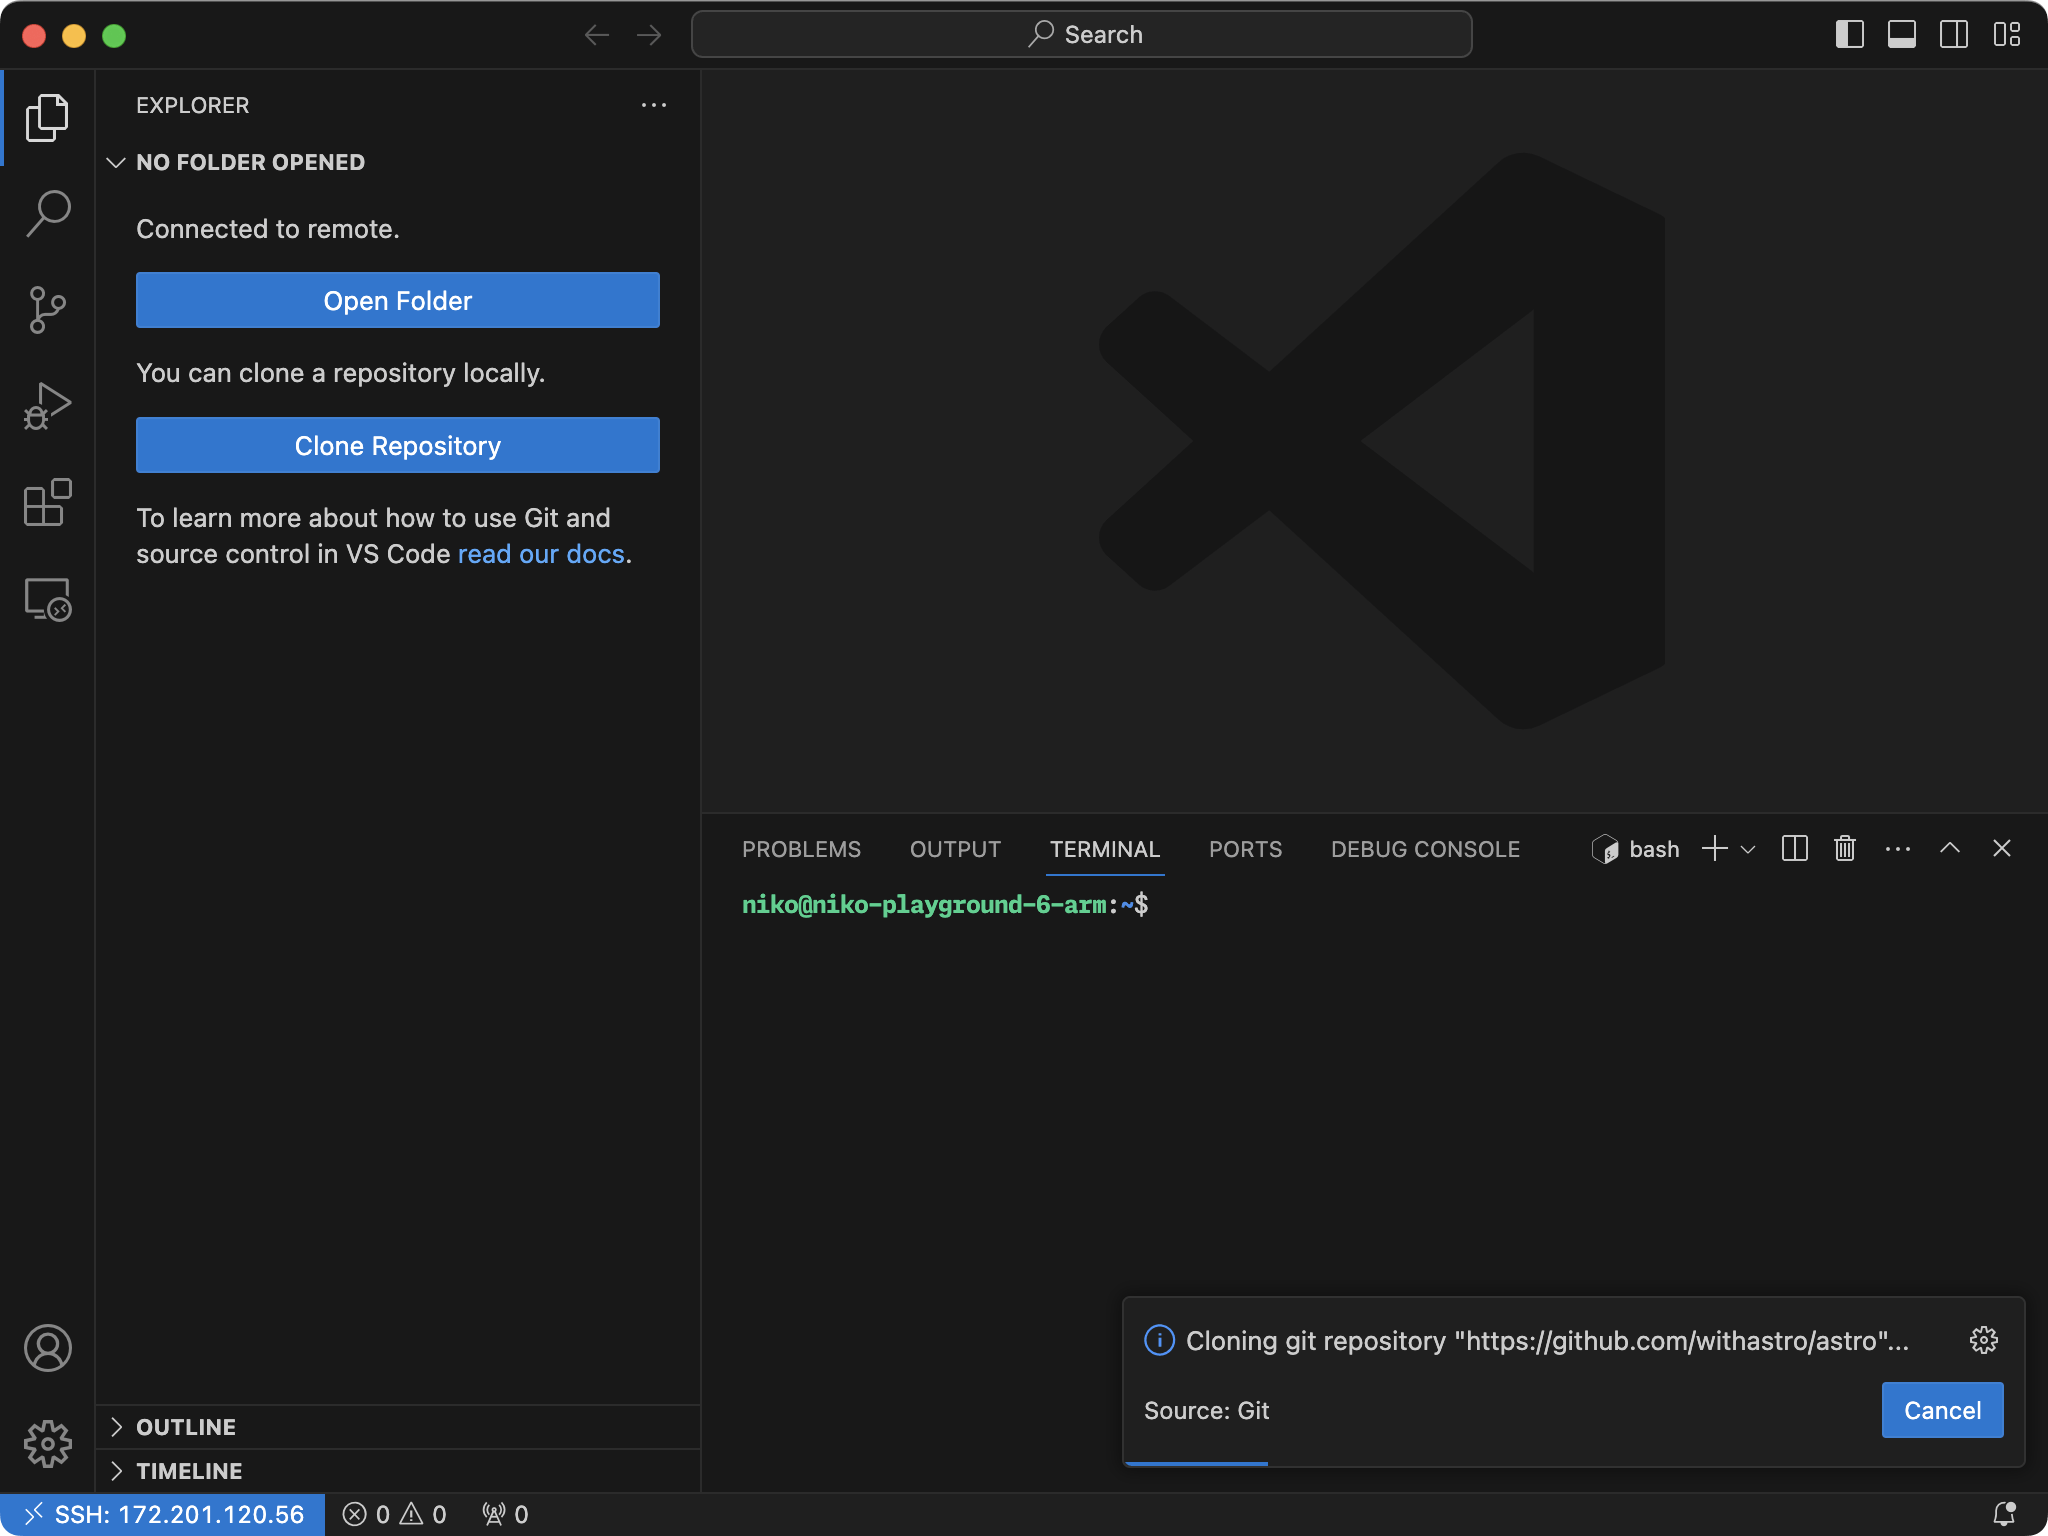
With our base environment setup, let's clone the repository of a sample web project to use for development.
Feel free to use your own project repository here if you already have code to work on. For our example, we will use the Astro web framework git repository.
You can use the file explorer button and option to "Clone Repository":
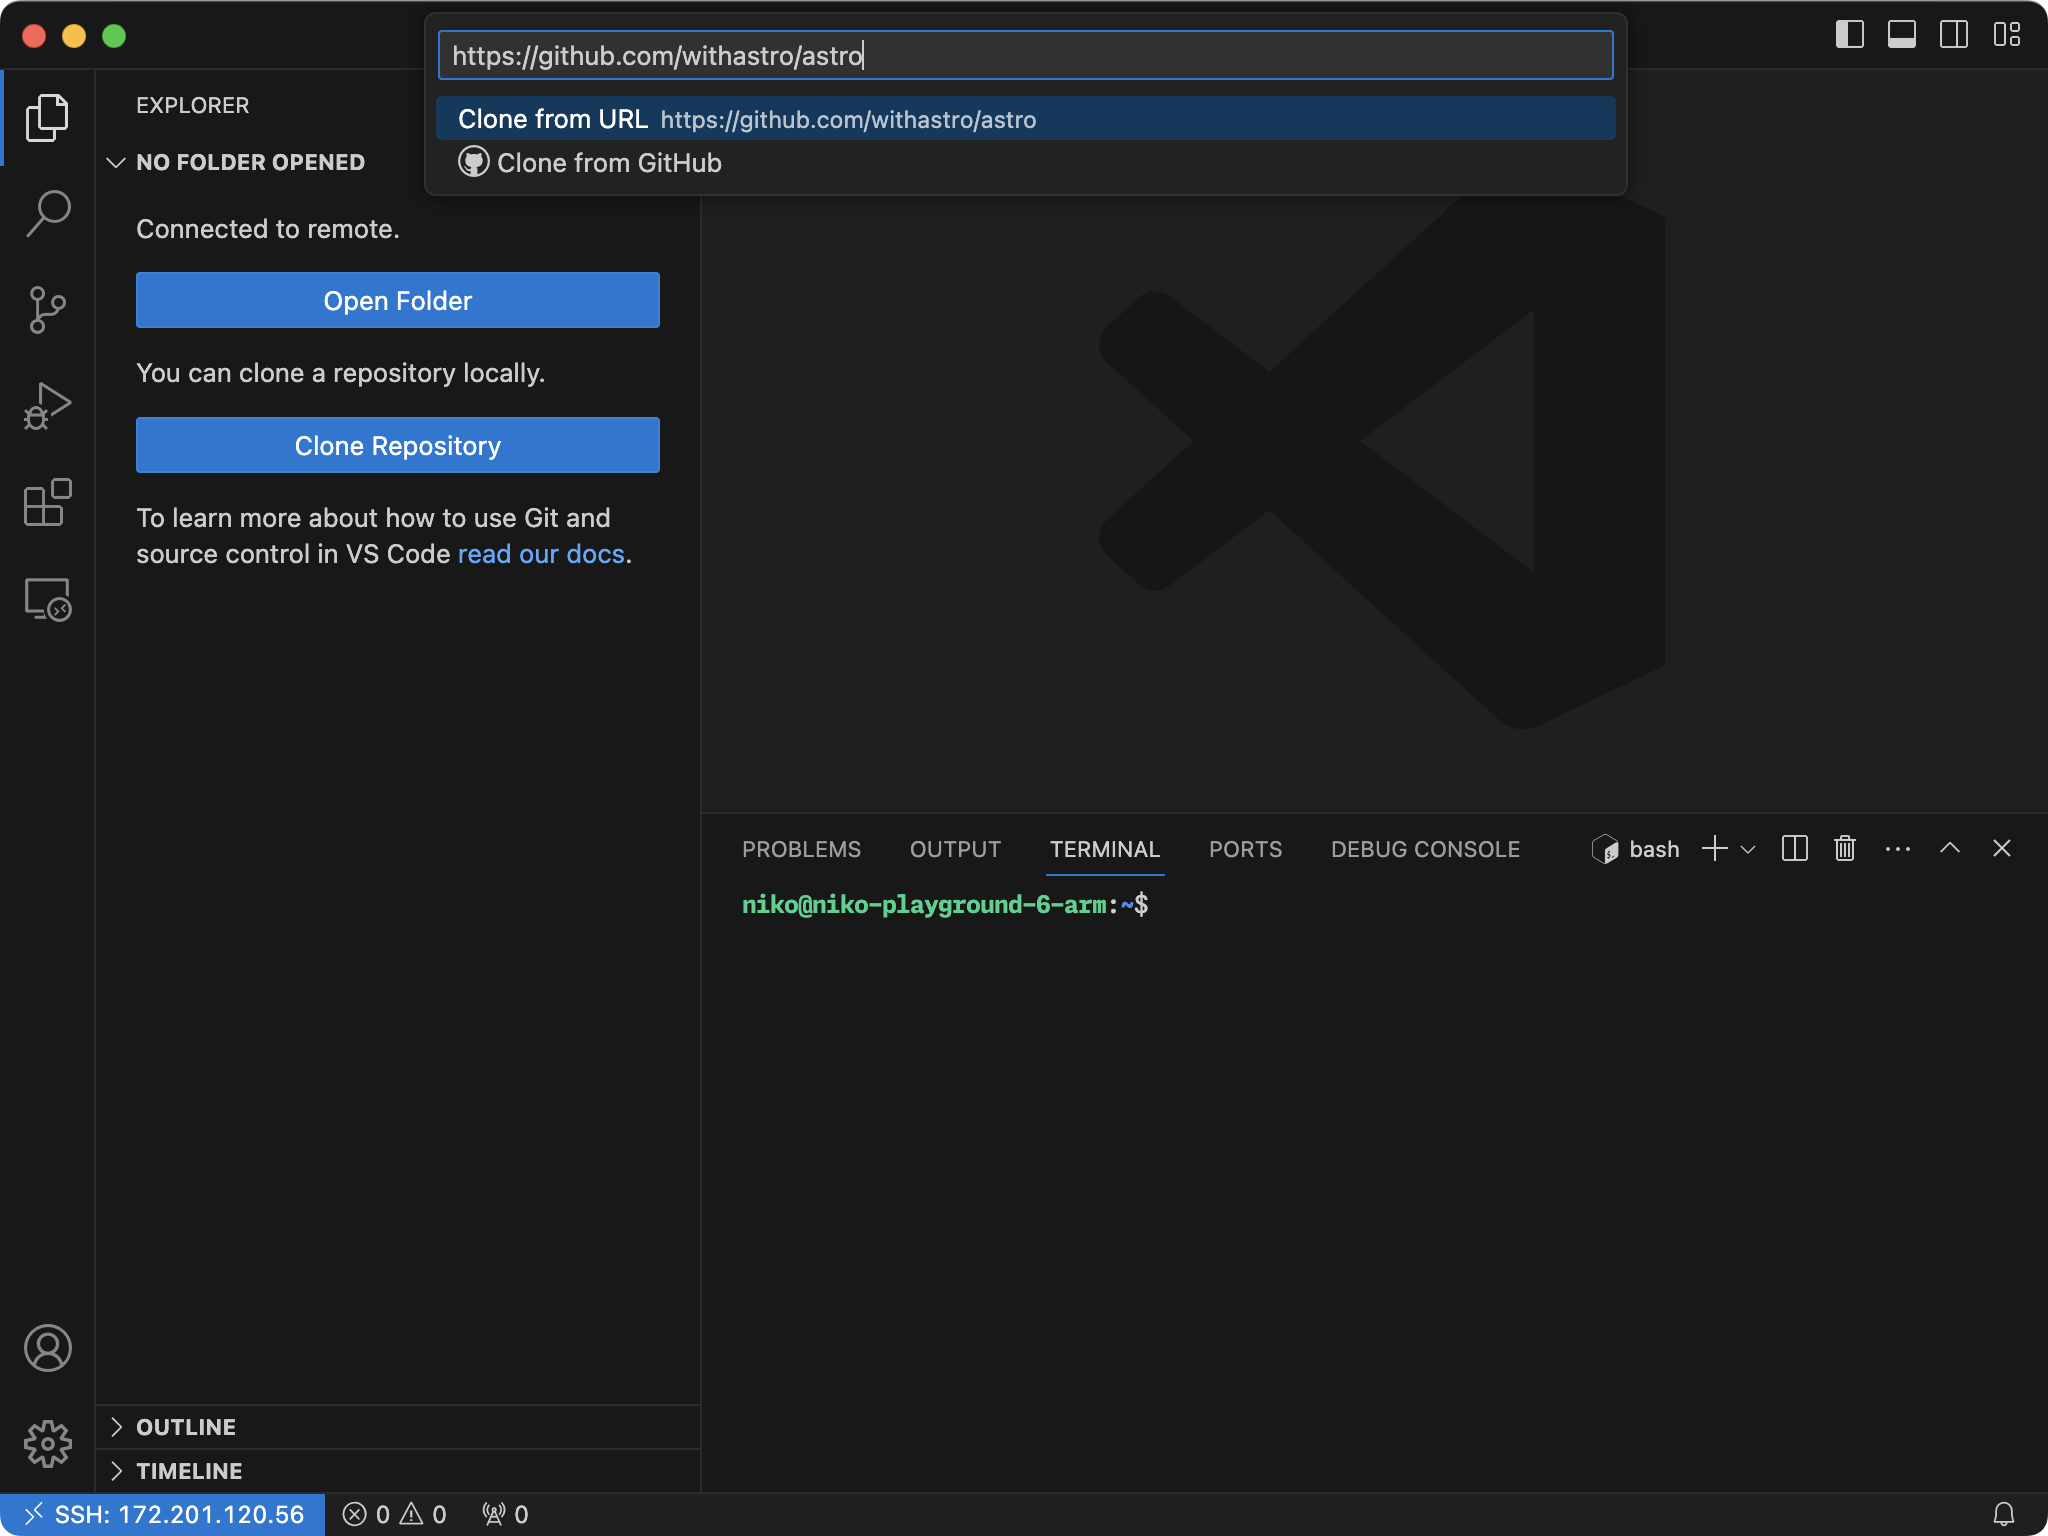
You will be prompted: "Cloning a repository in a Dev Container may execute arbitrary code." to confirm.
Or you could use the VS Code terminal and execute the commands directly.
1# Git clone the project2git clone https://github.com/my-user/my-project.git3# Change directory4cd my-project
Open the project folder by clicking on the pop-up alert or using File > Open Folder and select the folder you cloned previously.
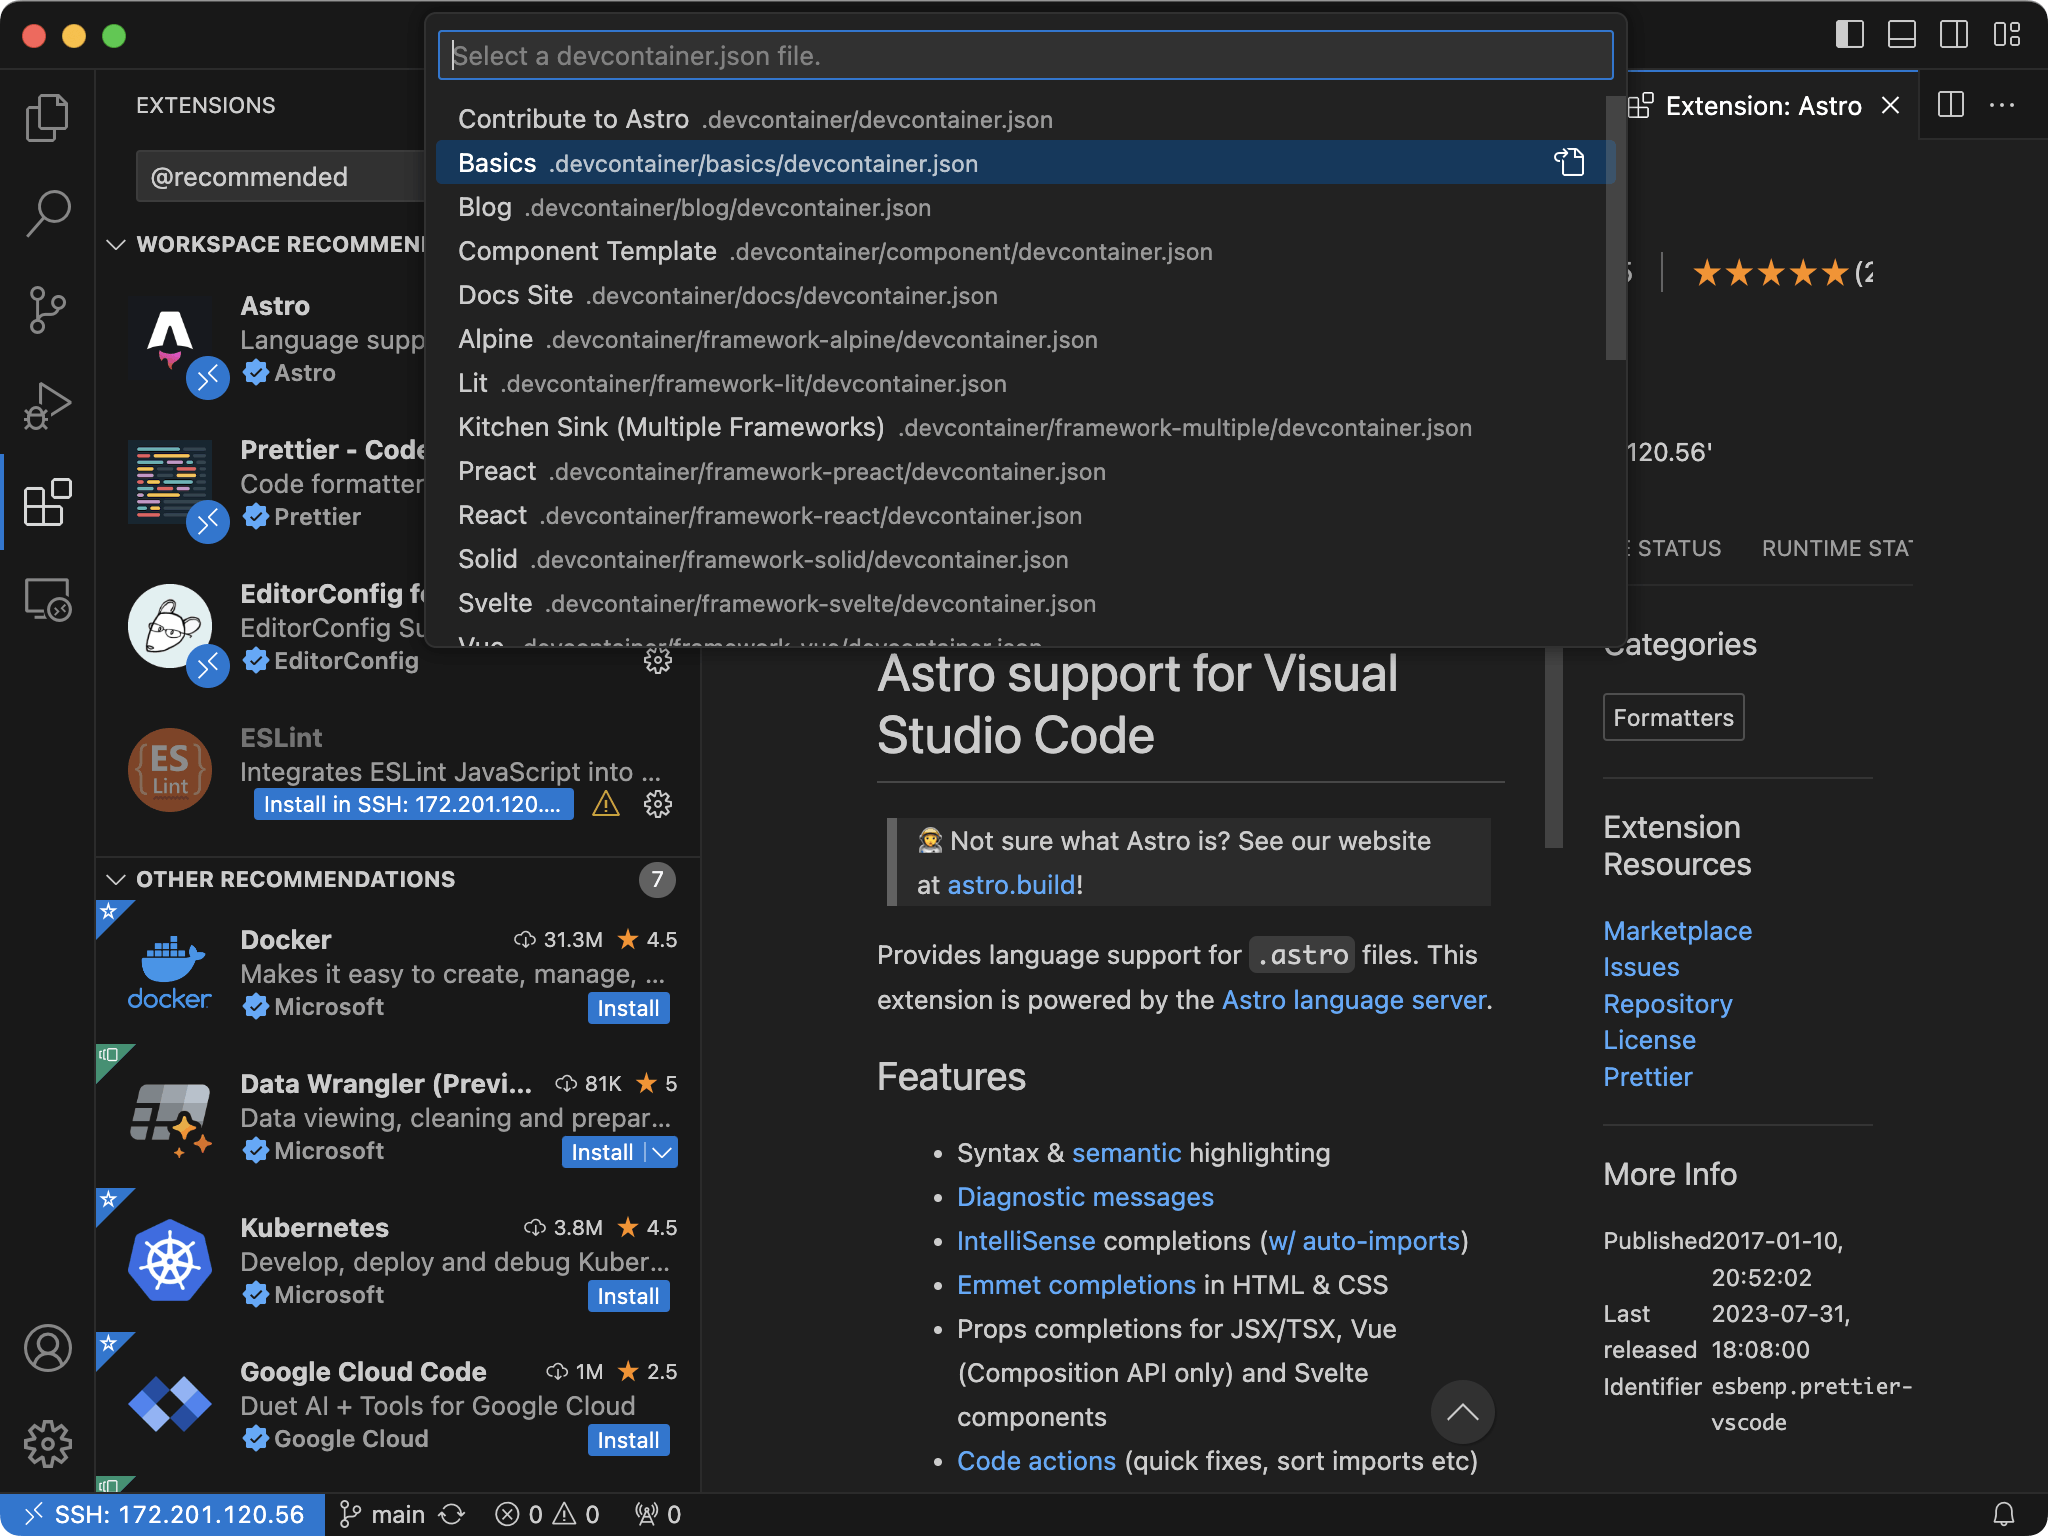
For the Astro repository, you will be offered to install a set of helpful extensions for your Visual Studio Code, such as language support for Astro, the Prettier code formatter, EditorConfig, and ESLint.

Step 5 - Standardizing Your Development Environment with Dev Container
The Astro repository contains multiple devcontainer.json files, enabling you to set up and run a standardized development environment tailored to your needs. Whether you're contributing to the Astro project, contributing to documentation, or working within a particular framework like React, these configurations facilitate a seamless development experience.
Understanding and Harnessing Dev Containers
Development Containers is an open standard designed by Microsoft to enhance containers with content and settings tailored specifically for development purposes.
Dev Containers are defined using devcontainer.json files, which specify the environment's settings, extensions, and Docker configurations necessary for development. This approach ensures that all developers working on a project have a consistent set of tools and runtime environments, minimizing the "works on my machine" problem.
Dev Containers will ensure a seamless development experience across different machines, similar to what one might expect from using a platform like Codespaces, but with the flexibility and control of a custom setup. This setup is particularly beneficial for collaborative projects or when working in diverse environments, as it abstracts the underlying system configurations and focuses on providing a unified development experience.
Dev Container Basic Example from Astro
The following JSON snippet is an example of an Astro Basics devcontainer.json configuration.
1{2 "name": "Basics",3 "build": {4 "dockerfile": "../examples.Dockerfile"5 },67 "workspaceFolder": "/workspaces/astro/examples/basics",89 "portsAttributes": {10 "4321": {11 "label": "Application",12 "onAutoForward": "openPreview"13 }14 },1516 "forwardPorts": [4321],1718 "postCreateCommand": "pnpm install && cd /workspaces/astro && pnpm run build",1920 "waitFor": "postCreateCommand",2122 "postAttachCommand": {23 "Server": "pnpm start --host"24 },2526 "customizations": {27 "codespaces": {28 "openFiles": ["src/pages/index.astro"]29 },30 "vscode": {31 "extensions": ["astro-build.astro-vscode", "esbenp.prettier-vscode"]32 }33 }34}
Let's break down its components:
build: Here,"dockerfile": "../examples.Dockerfile"points to a Dockerfile relative to the location of thedevcontainer.jsonfile. This Dockerfile contains instructions for building the Docker image that the development environment will use.portsAttributes: Defines attributes for ports used by the container. The configuration for port4321includes the label "Application" and specifies that when this port is auto-forwarded, a preview should be opened automatically ("onAutoForward": "openPreview").forwardPorts: Lists the ports that should be forwarded from the container to the host machine, allowing access to services running inside the container.postCreateCommand: Specifies a command to run after the container is created but before a user connects. Here, it installs project dependencies usingpnpm install, then builds the project withpnpm run build, ensuring the environment is ready for development.postAttachCommand: Defines commands to run after a user attaches to the container. This example specifies that theServershould start usingpnpm start --host, preparing the Astro development server for use.customizations: Contains environment-specific customizations. Undercodespaces, it automatically opens the filesrc/pages/index.astroupon starting, which is useful for getting straight to editing the main page. Thevscodesection lists recommended extensions (astro-build.astro-vscodefor Astro support andesbenp.prettier-vscodefor code formatting with Prettier) to enhance the development experience within VS Code.
Each part of this configuration ensures that the development environment is tailored to the project's needs, from the Docker build process to the setup and ready state of the development server, including the developer's workspace setup in Visual Studio Code.
Open Project in Dev Container
To open your project folder in a dev container:
Open the command palette again.
Select "Remote-Containers: Open Folder in Container..."
Choose your project folder.
VS Code will start the dev container, install extensions, and connect automatically.
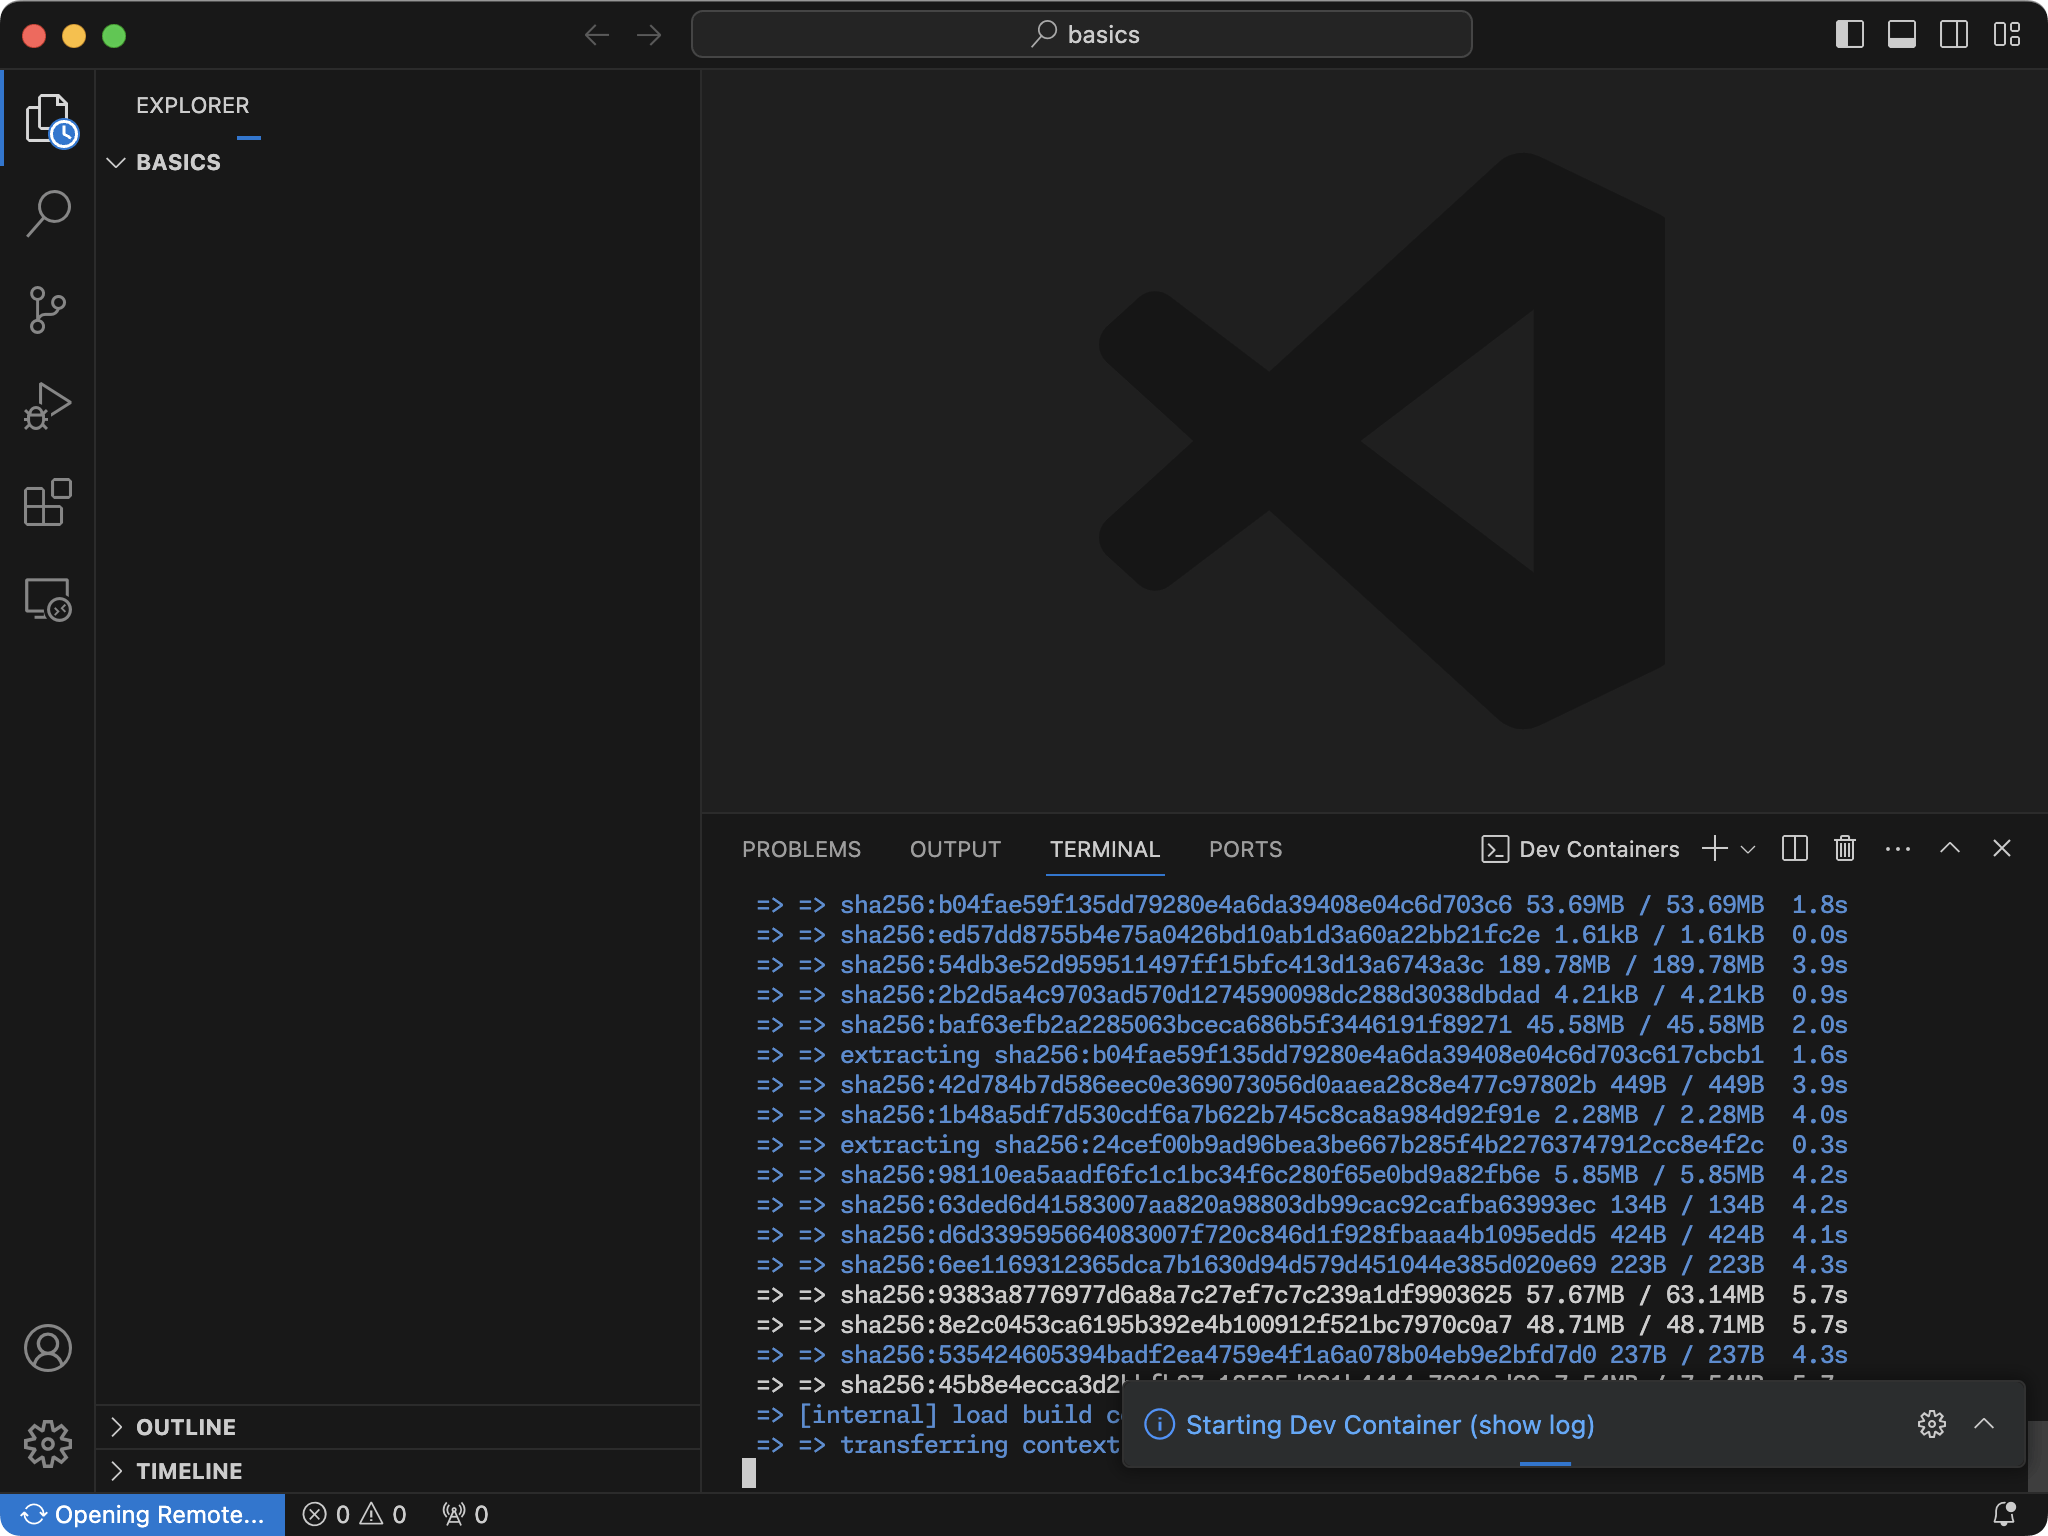
The setup time for your development environment will vary based on the configuration specified in your devcontainer.json file, so anticipate a short wait. While prebuilds can often mitigate this delay, that is a subject better suited for a separate discussion.

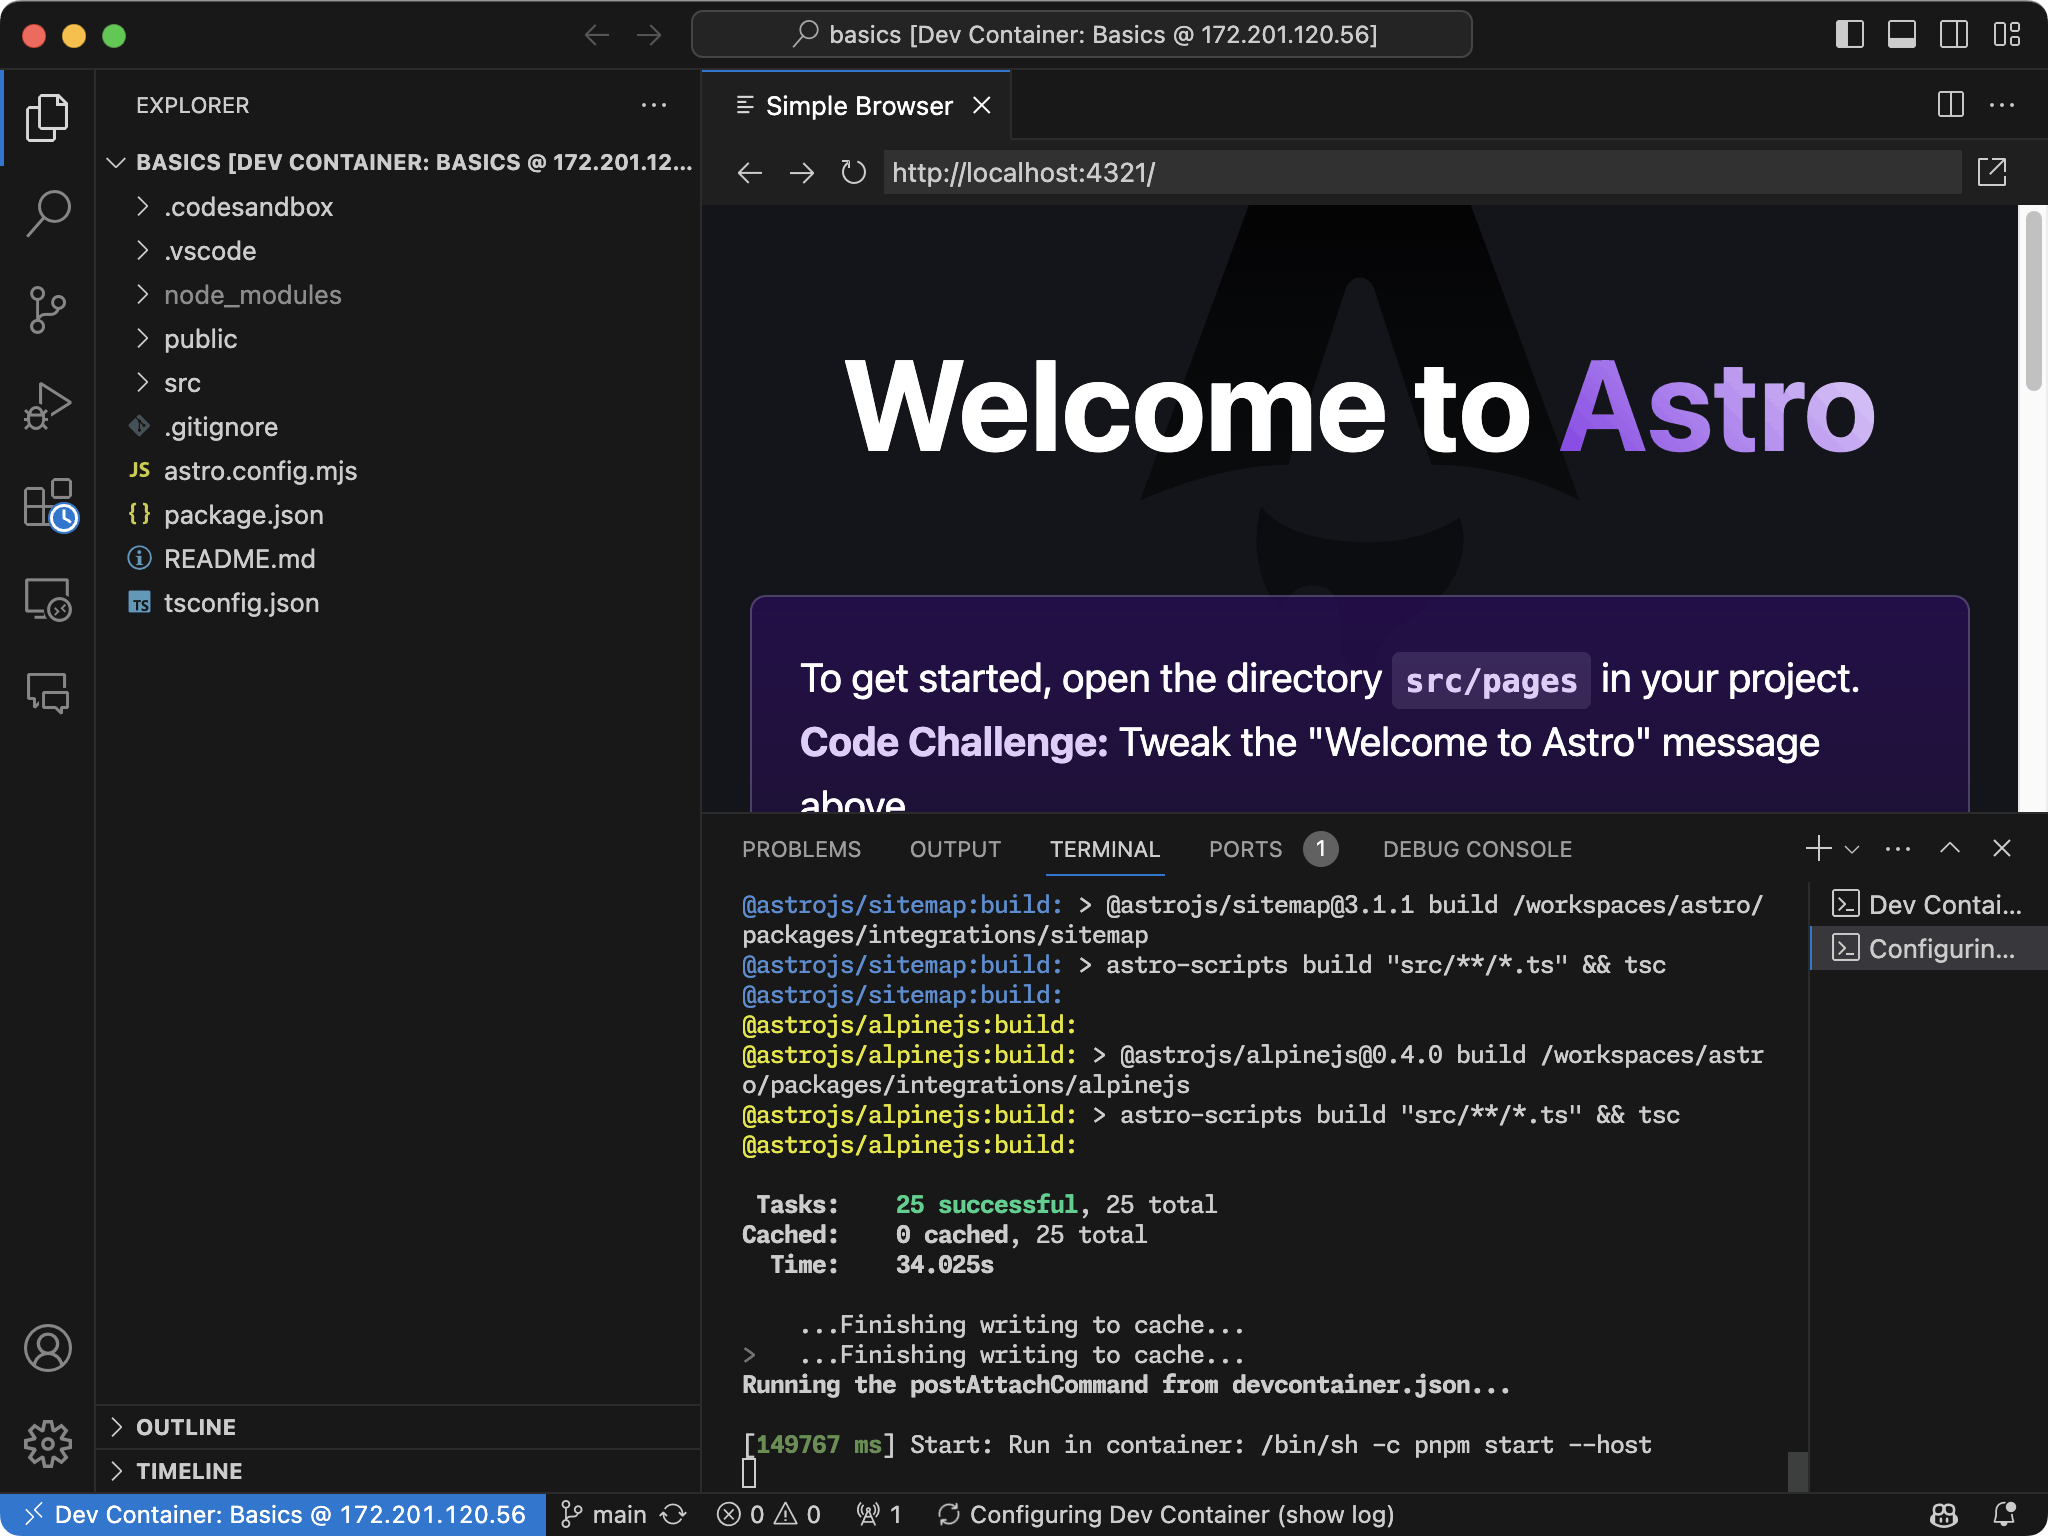
You now have a fully featured, standardized remote development environment accessible through VS Code on your local machine!
Step 6: Run Preview Dev Server
In VS Code, once the container is ready, and if the dev container of your choice didn't run the server, open a new terminal within VS Code and start your application.
You can execute a command to start the preview if your project is web-based. In the case of our Astro project, the command is as follows. However, your specific command may vary.
1pnpm run dev
Step 7 - Securely Share and Expose Your Projects on the Internet Behind a Domain
To share your environment or collaborate with others, we can expose services securely over the internet. There are reverse proxy services that allow this to function without a public IP and even behind a firewall. For instance, in our example, we are using ngrok.
First, retrieve your ngrok authentication token from the ngrok dashboard.
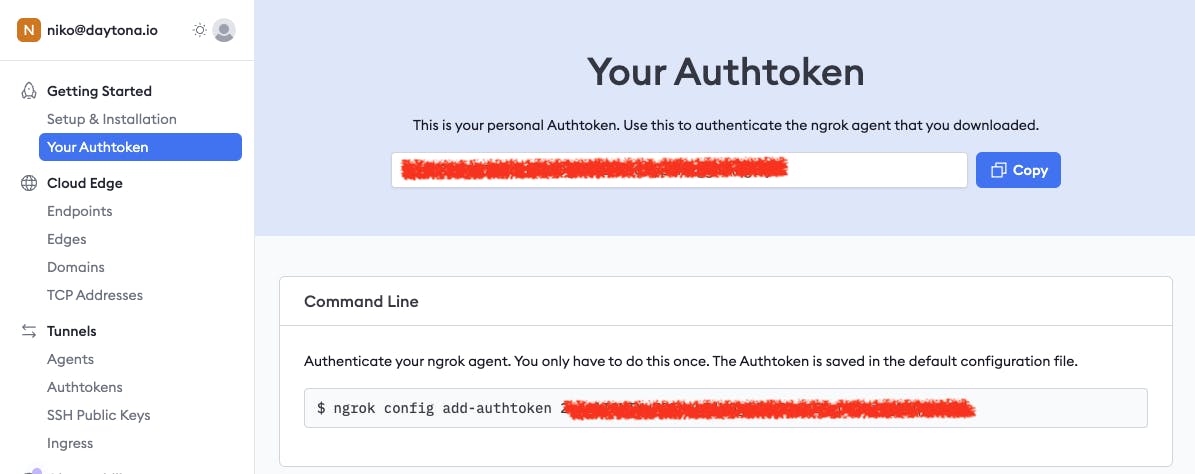
Install Ngrok from their site, and authenticate it with your account auth token:
1# Download and extract Ngrok2curl -s https://ngrok-agent.s3.amazonaws.com/ngrok.asc | \3 sudo tee /etc/apt/trusted.gpg.d/ngrok.asc >/dev/null && \4 echo "deb https://ngrok-agent.s3.amazonaws.com buster main" | \5 sudo tee /etc/apt/sources.list.d/ngrok.list && \6 sudo apt update && sudo apt install ngrok78# Add authtoken9ngrok config add-authtoken <TOKEN>
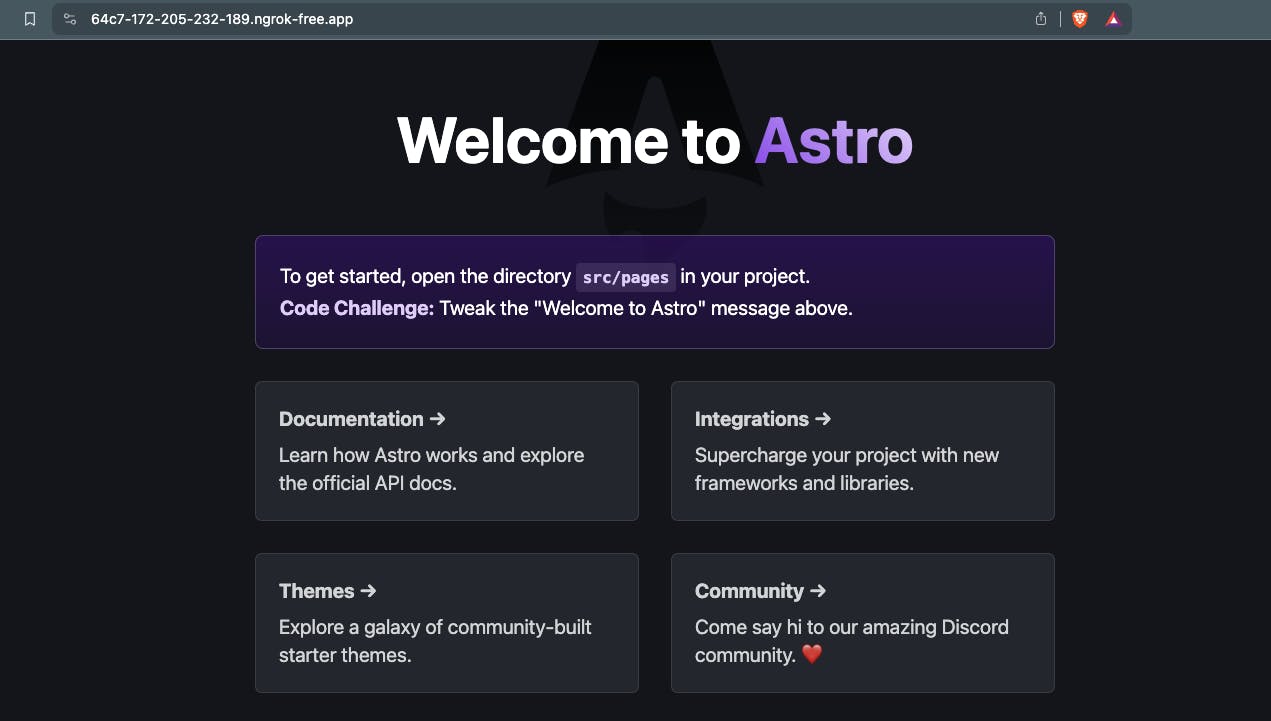
To give internet access to our app container from earlier at port 4321, run:
1ngrok http 4321
Copy the ngrok tunnel URL provided in the output.

Your application should now be running and accessible via the Ngrok tunnel URL.
Paste the Ngrok tunnel URL into your browser to access your application. If you encounter a connection refused error, ensure that the necessary port is open on your server's firewall.
To maintain a consistent URL for each ngrok session, set up a static domain via your dashboard. Once you've created it, you can instruct the ngrok agent to utilize this domain using the --domain flag. Begin by halting the current ngrok process with Ctrl+C, and then restart ngrok to apply the changes.
1ngrok http 4321 --domain jumpy-red-mollusk.ngrok-free.app
If you prefer to limit access to your application, you can easily implement authentication with ngrok without modifying your app. For instance, if you use the Google account alan@example.com, you can restrict access to yourself alone by executing ngrok with the following command:
1ngrok http 4321 --oauth=google --oauth-allow-email=alan@example.com
When someone attempts to use your app, they must sign in using Google, and access will be exclusively permitted to your account. Please be aware that each time you restart ngrok without using the --domain flag, your app's URL will change.
If you wish to go a step further, ngrok also enables the use of your own custom domain. By leveraging CNAME records, ngrok hosts an endpoint on your custom domain and offers comprehensive management of the TLS certificate lifecycle on your behalf.
Step 8 - Code on the Go with a Web IDE on Any Device (optional)
After setting up your application and ensuring it's accessible via Ngrok, you might want to take advantage of the OpenVSCode Server, an open-source project licensed under MIT and maintained by Gitpod, for a full web IDE experience, which allows you to run a web version of VS Code on your server and access it through your web browser.
Here's how to set it up and run it:
Start the OpenVSCode Server: Within your remote server, install the OpenVSCode Server by running the following Docker command.
1docker run -it --init -p 3000:3000 -v "$(pwd):/home/workspace:cached" gitpod/openvscode-server
Configure Inbound Port Rules: To access the OpenVSCode Server, you need to configure the network settings to allow traffic on the port it's running on. If you're using a service like Azure, navigate to the network settings and set an inbound port rule to allow TCP traffic on port 3000. Ensure that you review the firewall configurations on your server, utilizing tools such as ufw or iptables.
Test the Connection: Once the port is open, try accessing
http://remote_server_ip:3000in your web browser. Replaceremote_server_ipwith your server's actual IP address. If you encounter a security warning about the connection not being private (which may happen in some browsers like Chrome), try using a different browser like Safari that may not present this issue. Please note that configuring HTTPS falls outside the scope of this guide.Access web IDE VS Code: If everything is configured correctly, you should see the OpenVSCode Server interface in your browser. You can now access your project straight from the Docker image without additional configuration.
Now, you'll have a powerful, browser-based web IDE to access from anywhere, making your development process even more flexible and accessible.
Conclusion
Congratulations! You've successfully set up your own fully-featured remote development environment without being locked into a proprietary platform!
You can now develop directly inside a container, ensuring a consistent development stack isolated from your local environment. With Ngrok, you have also secured your development environment with a tunnel to be shared with your team for collaboration.
Key aspects included:
Provisioning a Linux server to host your infrastructure
Installing Docker Engine and Docker Compose to define environments
Getting Visual Studio Code Server running to enable remote coding
Using Docker containers to encapsulate infrastructure dependencies
Adding security through SSH, HTTPS encryption, authentication
Scripting setup steps to allow automation and portability
Exposing services securely over the internet with Ngrok
You can now develop from anywhere using this robust, self-managed environment tailored to your needs!
Some additional pointers:
Commit the
.devcontainerfolder to source control to share with the team.Use Docker Compose for multi-service applications.
Install the Remote - Containers extension to use dev containers locally.
Read the docs of each tool we have used for more advanced configuration and troubleshooting.
Remember to delete any temporary accounts or services you no longer need to maintain security and avoid unnecessary charges.
Let me know if you have any other questions.
Step 9 - Can we automate this?
This is the process you'll undergo for setting up each remote development environment you create, and it's no simple task.
As an engineer, you might often find yourself thinking, "Could I automate this task with some scripts?" While the answer is yes to some extent, it's important to remember that any modifications you make will necessitate script updates. Eventually, you may find that you have to perform the task manually once more.
For consistency and portability across projects, we can automate the process using provisioning scripts.
First, create a setup script setup.sh that executes our past commands:
1#!/bin/bash23# Add Docker's official GPG key4curl -fsSL https://download.docker.com/linux/ubuntu/gpg | sudo gpg --dearmor -o /usr/share/keyrings/docker-archive-keyring.gpg56# Add Docker repository7echo "deb [arch=amd64 signed-by=/usr/share/keyrings/docker-archive-keyring.gpg] https://download.docker.com/linux/ubuntu $(lsb_release -cs) stable" | sudo tee /etc/apt/sources.list.d/docker.list > /dev/null89# Update and upgrade the system packages10sudo apt update && sudo apt upgrade -y1112# Install necessary packages for Docker installation13sudo apt install apt-transport-https ca-certificates curl software-properties-common -y1415# Install Docker Engine, CLI, and containerd16sudo apt install docker-ce docker-ce-cli containerd.io docker-compose-plugin -y1718# Add current user to the Docker group to run Docker commands without sudo19sudo usermod -aG docker ${USER}2021# Print Docker version to verify installation22docker --version2324# Install and configure Ngrok25echo "Installing Ngrok..."26curl -s https://ngrok-agent.s3.amazonaws.com/ngrok.asc | \27 sudo tee /etc/apt/trusted.gpg.d/ngrok.asc >/dev/null && \28 echo "deb https://ngrok-agent.s3.amazonaws.com buster main" | \29 sudo tee /etc/apt/sources.list.d/ngrok.list && \30 sudo apt update && sudo apt install ngrok3132echo "Please enter your Ngrok auth token (You can find it on your Ngrok dashboard):"33read NGROK_AUTH_TOKEN34ngrok config add-authtoken $NGROK_AUTH_TOKEN35echo "Ngrok installed and configured."3637# Install OpenVSCode Server using Docker38echo "Installing OpenVSCode Server..."39docker run -d --init -p 3000:3000 -v "/workspace:/home/workspace:cached" gitpod/openvscode-server40echo "OpenVSCode Server is running on port 3000. Access it at http://your_server_ip:3000"4142# VS Code Server installation instructions43echo "To connect Visual Studio Code to this remote environment:"44echo "1. Install the Remote - SSH extension in VS Code on your local machine."45echo "2. Use the Command Palette in VS Code to run 'Remote-SSH: Connect to Host...' and enter this server's SSH credentials."4647echo "Setup complete. Please log out and back in for group changes to take effect."
Run the script:
Copy the script above into a file named
setup.shon the server.Make the script executable with
chmod +x setup.sh.Execute the script with
./setup.sh.
Consider wrapping them into a simple CLI tool to simplify further.
Frankly, the situation is quite chaotic. The script is horrible and unlikely to function effectively because it requires customization to fit the particular system in question. Moreover, it doesn't address the routine tasks and interactions with repositories, workspaces, and the public preview, among other elements.
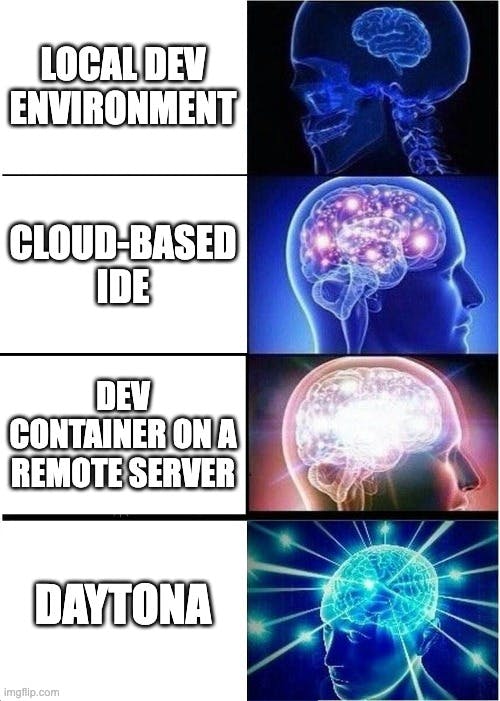
Perhaps there's a better way.
Follow Daytona on GitHub
Stay tuned for the imminent launch of Daytona on GitHub, our open-source project designed to automate development environment management. The aim to save developers and their teams substantial time by seamlessly standardizing dev environments across any machine, solving this challenge once and for all.
Follow Daytona on GitHub
Stay tuned for the imminent launch of open-source Daytona.
Join us in our mission to transform and accelerate the development process.